
Through the fathomless deeps of space swims the star turtle Great A’Tuin, bearing on its back the four giant elephants who carry on their shoulders the mass of the Discworld…
And now it can swim straight into your hands wink wink! This is a crochet pattern to make your own tiny Discworld. Making it is finnicky but not difficult, so it’s a great pattern for determined beginners. Yes, that means you can learn the basic crochet stitches on Thursday and then have your own A’Tuin by Sunday! For experienced crocheters, this is a great little stash buster.
This is my first time making a proper pattern so if some bits are unclear please comment here or on Twitter and I’ll rework it. Please don’t sell any finished ones (Discworld’s trademarked!) and link me if you do make one — I wanna see. 😀

Materials:
- Crochet hook: I used a 3mm/D crochet hook, but if you wanna make it even smaller go down to 2.5mm, and maybe go up to 4mm/G if you’re a beginner
- Scissors
- Yarn needle
- Stitch marker/a bit of yarn to mark your stitches
- Yarn: Up to you but here’s some suggestions:
- Elephants — grey for body, white for tusks, black for eyes
- Turtle — green for head + flippers + tail, grey for undershell, lighter green for shell, black for eyes
- Disc — green for land, blue for ocean, white for Cori Celesti
- Bit of stuffing
- A good audiobook if, like me, you hate sewing (sorry, there’s a lot of sewing)
Stitches you need to know + abbreviations:
I’m using the American stitch naming conventions. There’s hundreds of great YouTube tutorials (and even gifs!) if you’re just starting out. (I learned crocheting from the internet too.)
- ch – chain stitch
- sl st – slip stitch
- sc – single crochet
- inc – increase: 2 sc in one st
- dec – decrease: 2 sc together
- dec3 – decrease 3 st: same principle as dec but 3 sc together
- magic ring – either do a magic ring OR ch 6, sl st into first st and use that as base
Notes: I’ll be putting the amount of stitches you should have in this row in [square brackets]. For everything worked in a round, just do the stitches written; for everything worked in rows, add a ch and turn at the end of the row. For basically everything, leave a long end of yarn after you fasten off to sew onto the body.
World Elephants:
Start with the four world elephants — Tubul, Jerakeen, Berilia and Great T’Phon — because they’ll determine how large everything else needs to be. Below are the instructions for one, just do 4x for all of them.
Here’s Tubul, missing tusks:
Head/body:
Worked in a round.
- Magic ring
- 6 sc in magic ring [6]
- (inc) repeat 6 times [12]
- (inc, sc) repeat 6 times [18]
- sc in each st [18]
- sc in each st [18]
- sc in each st [18]
- (dec, sc) repeat 6 times [12]
- Stuff the head firmly
- (dec) repeat 6 times [6]
- Fasten off, weave in ends
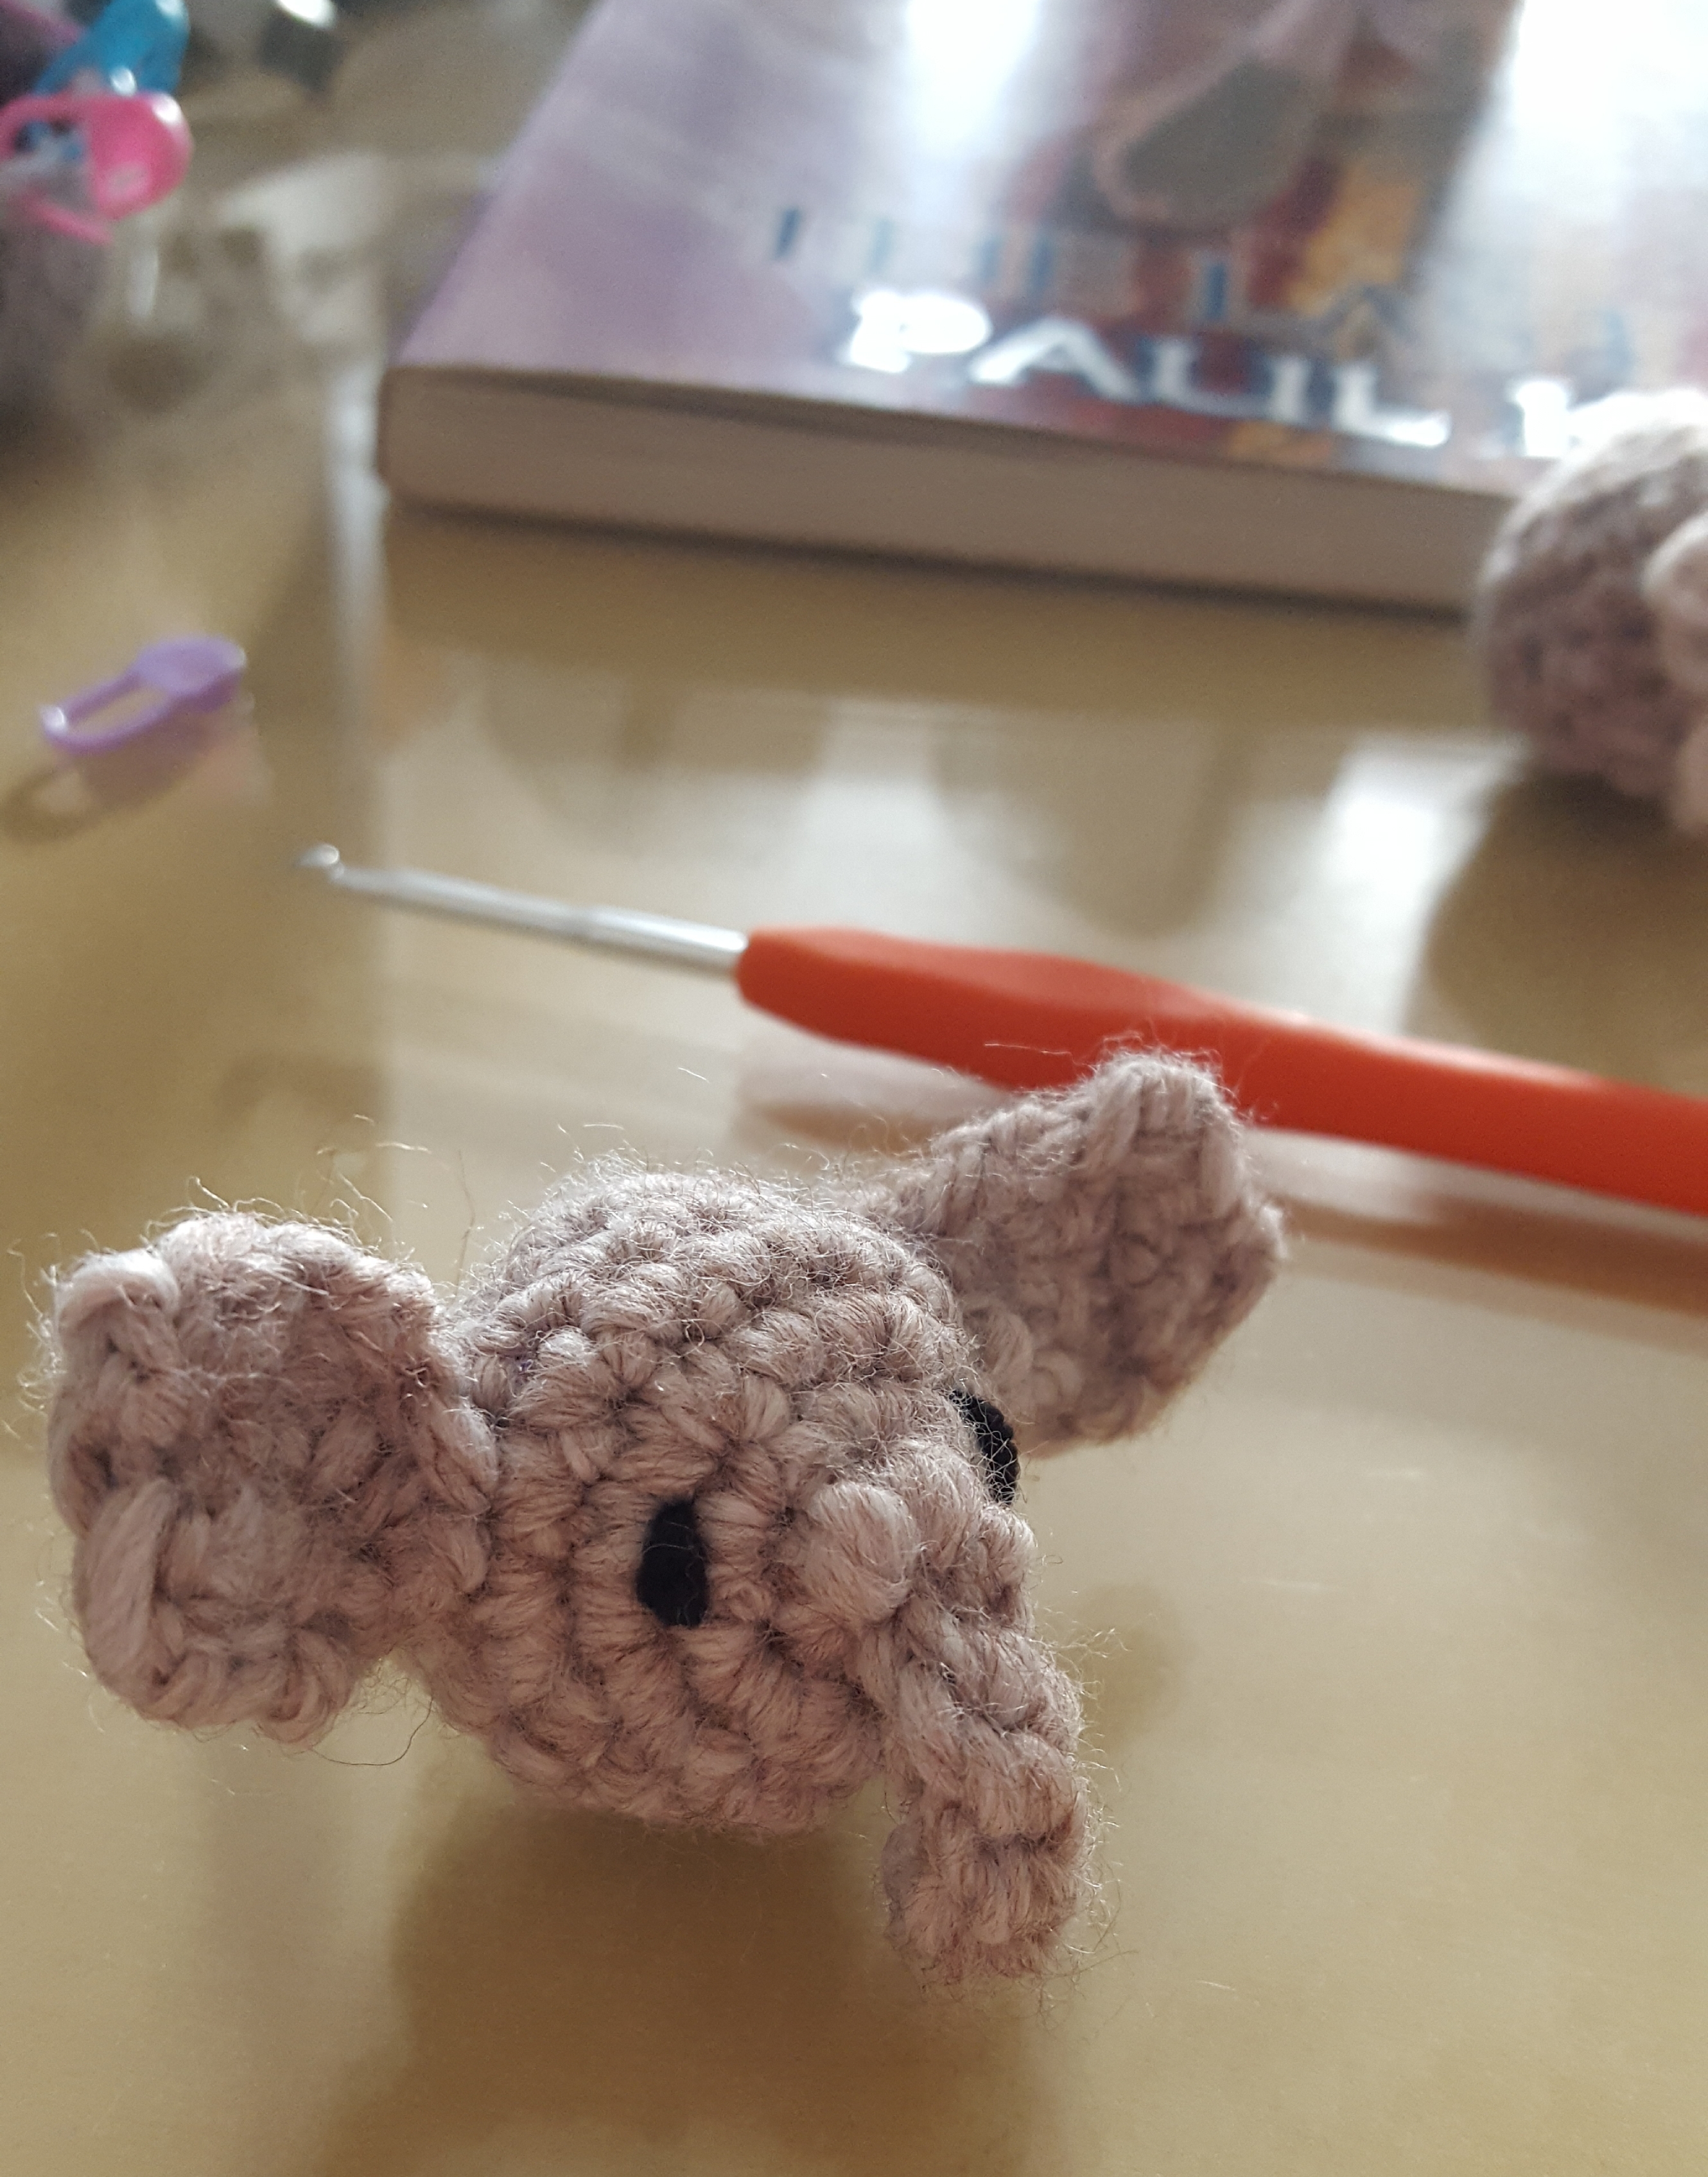
Ears (2x):
Worked in a row.
- ch 3
- sc, sc [2]
- inc, sc [3]
- sc, inc, sc [4]
- sc, dec, sc [3]
- Fasten off, leaving long end
The ears should be attached with row 1 to head. I used the long end left after fastening off to sew around the ear a bit to make the edges evener, ending at row 1 to use the yarn left to attach them to head.
Trunk:
Worked in a row
- ch 6 [6]
- sl st 5 [5]
- Fasten off, leave long end for sewing in
Tusk (2x):
Worked in rows
- ch 3 [3]
- sl st 2 [2]
- Fasten off, leave long end for sewing in
Assembling elephants:
Sew ears, trunk, and tusks to each head. Stitch in some eyes. The easiest way to attach the elephants to each other is to take a long piece of yarn, the colour of the elephants’ bodies, sew straight through them all a couple times, then firmly double knot the two ends of the yarn together. You then get a little “elephant ornament” like this:
A’Tuin:
Because the size of your elephant combo depends so much on your yarn, stuffing, etc., it’s a little hard to give instructions for the shell size. You may have to do more or less rows/stitches for them depending on how much of the shell you want to peep out from underneath the elephants.
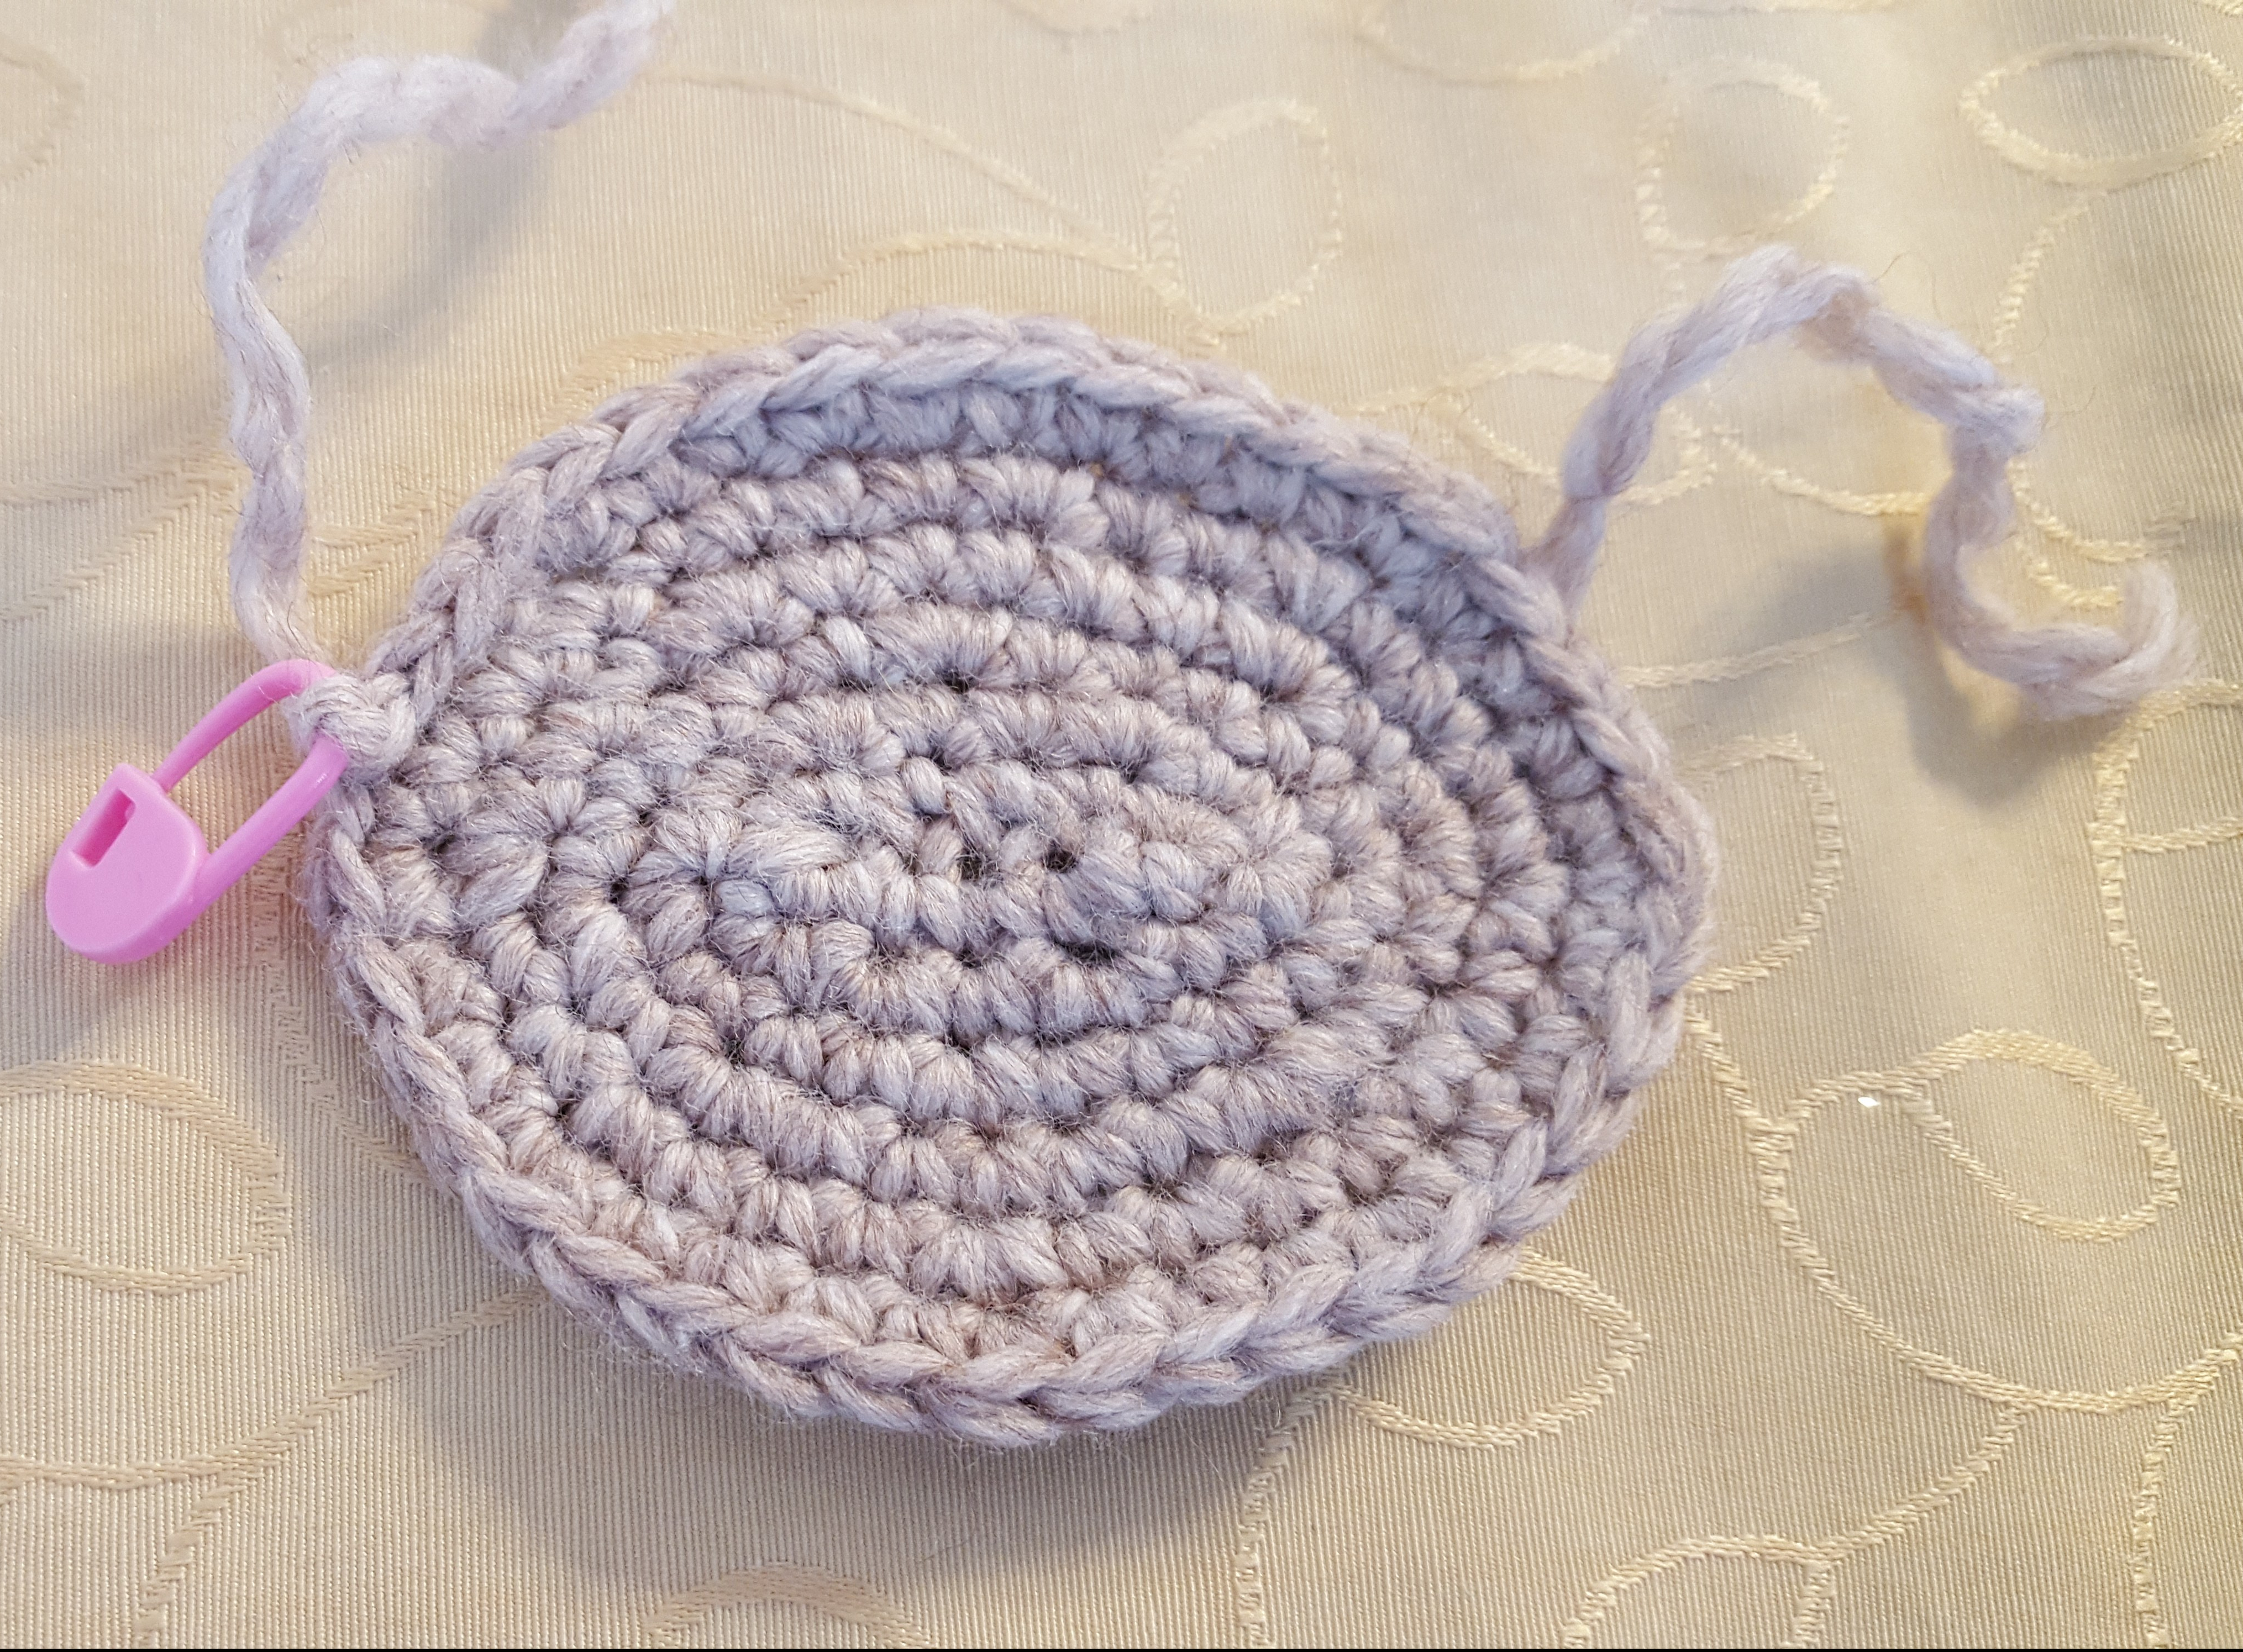
Overshell:
For the overshell you have to make an oval. Here’s the best tutorial for basic ovals I found. Anything basically oval-y will fit, but here’s my exact stitch count. (Remember that when you reach the end of the chain, do not turn but continue stitching into the ch on the other side. After row 1 you’ll continue working in the round, like for the elephant head.)
- ch 6 [6]
- sc 5, sc 2 more into last st, continue to other side of chain, sc 3, sc 2 into last stitch [12]
- work next st into first sc of row 2; inc, inc, sc, inc, sc, inc, sc, inc, sc, sc, inc, sc [18]
- inc, sc 3, inc, sc 4, inc, sc 4, inc, sc 3 [22]
- sc, inc, sc, inc, sc 5, inc, sc 2, inc, sc, inc, sc 5, inc, sc [28]
- sc, inc, sc 6, inc, sc 6, inc, sc 6, inc, sc 5 [32]
- sc 2, inc, sc 2, inc, sc 8, inc, sc 3, inc, sc 3, inc, sc 8, inc [38]
- sl st 3, fasten off
Your shell should look something like this; take the slightly pointier edge as the ‘tail’:
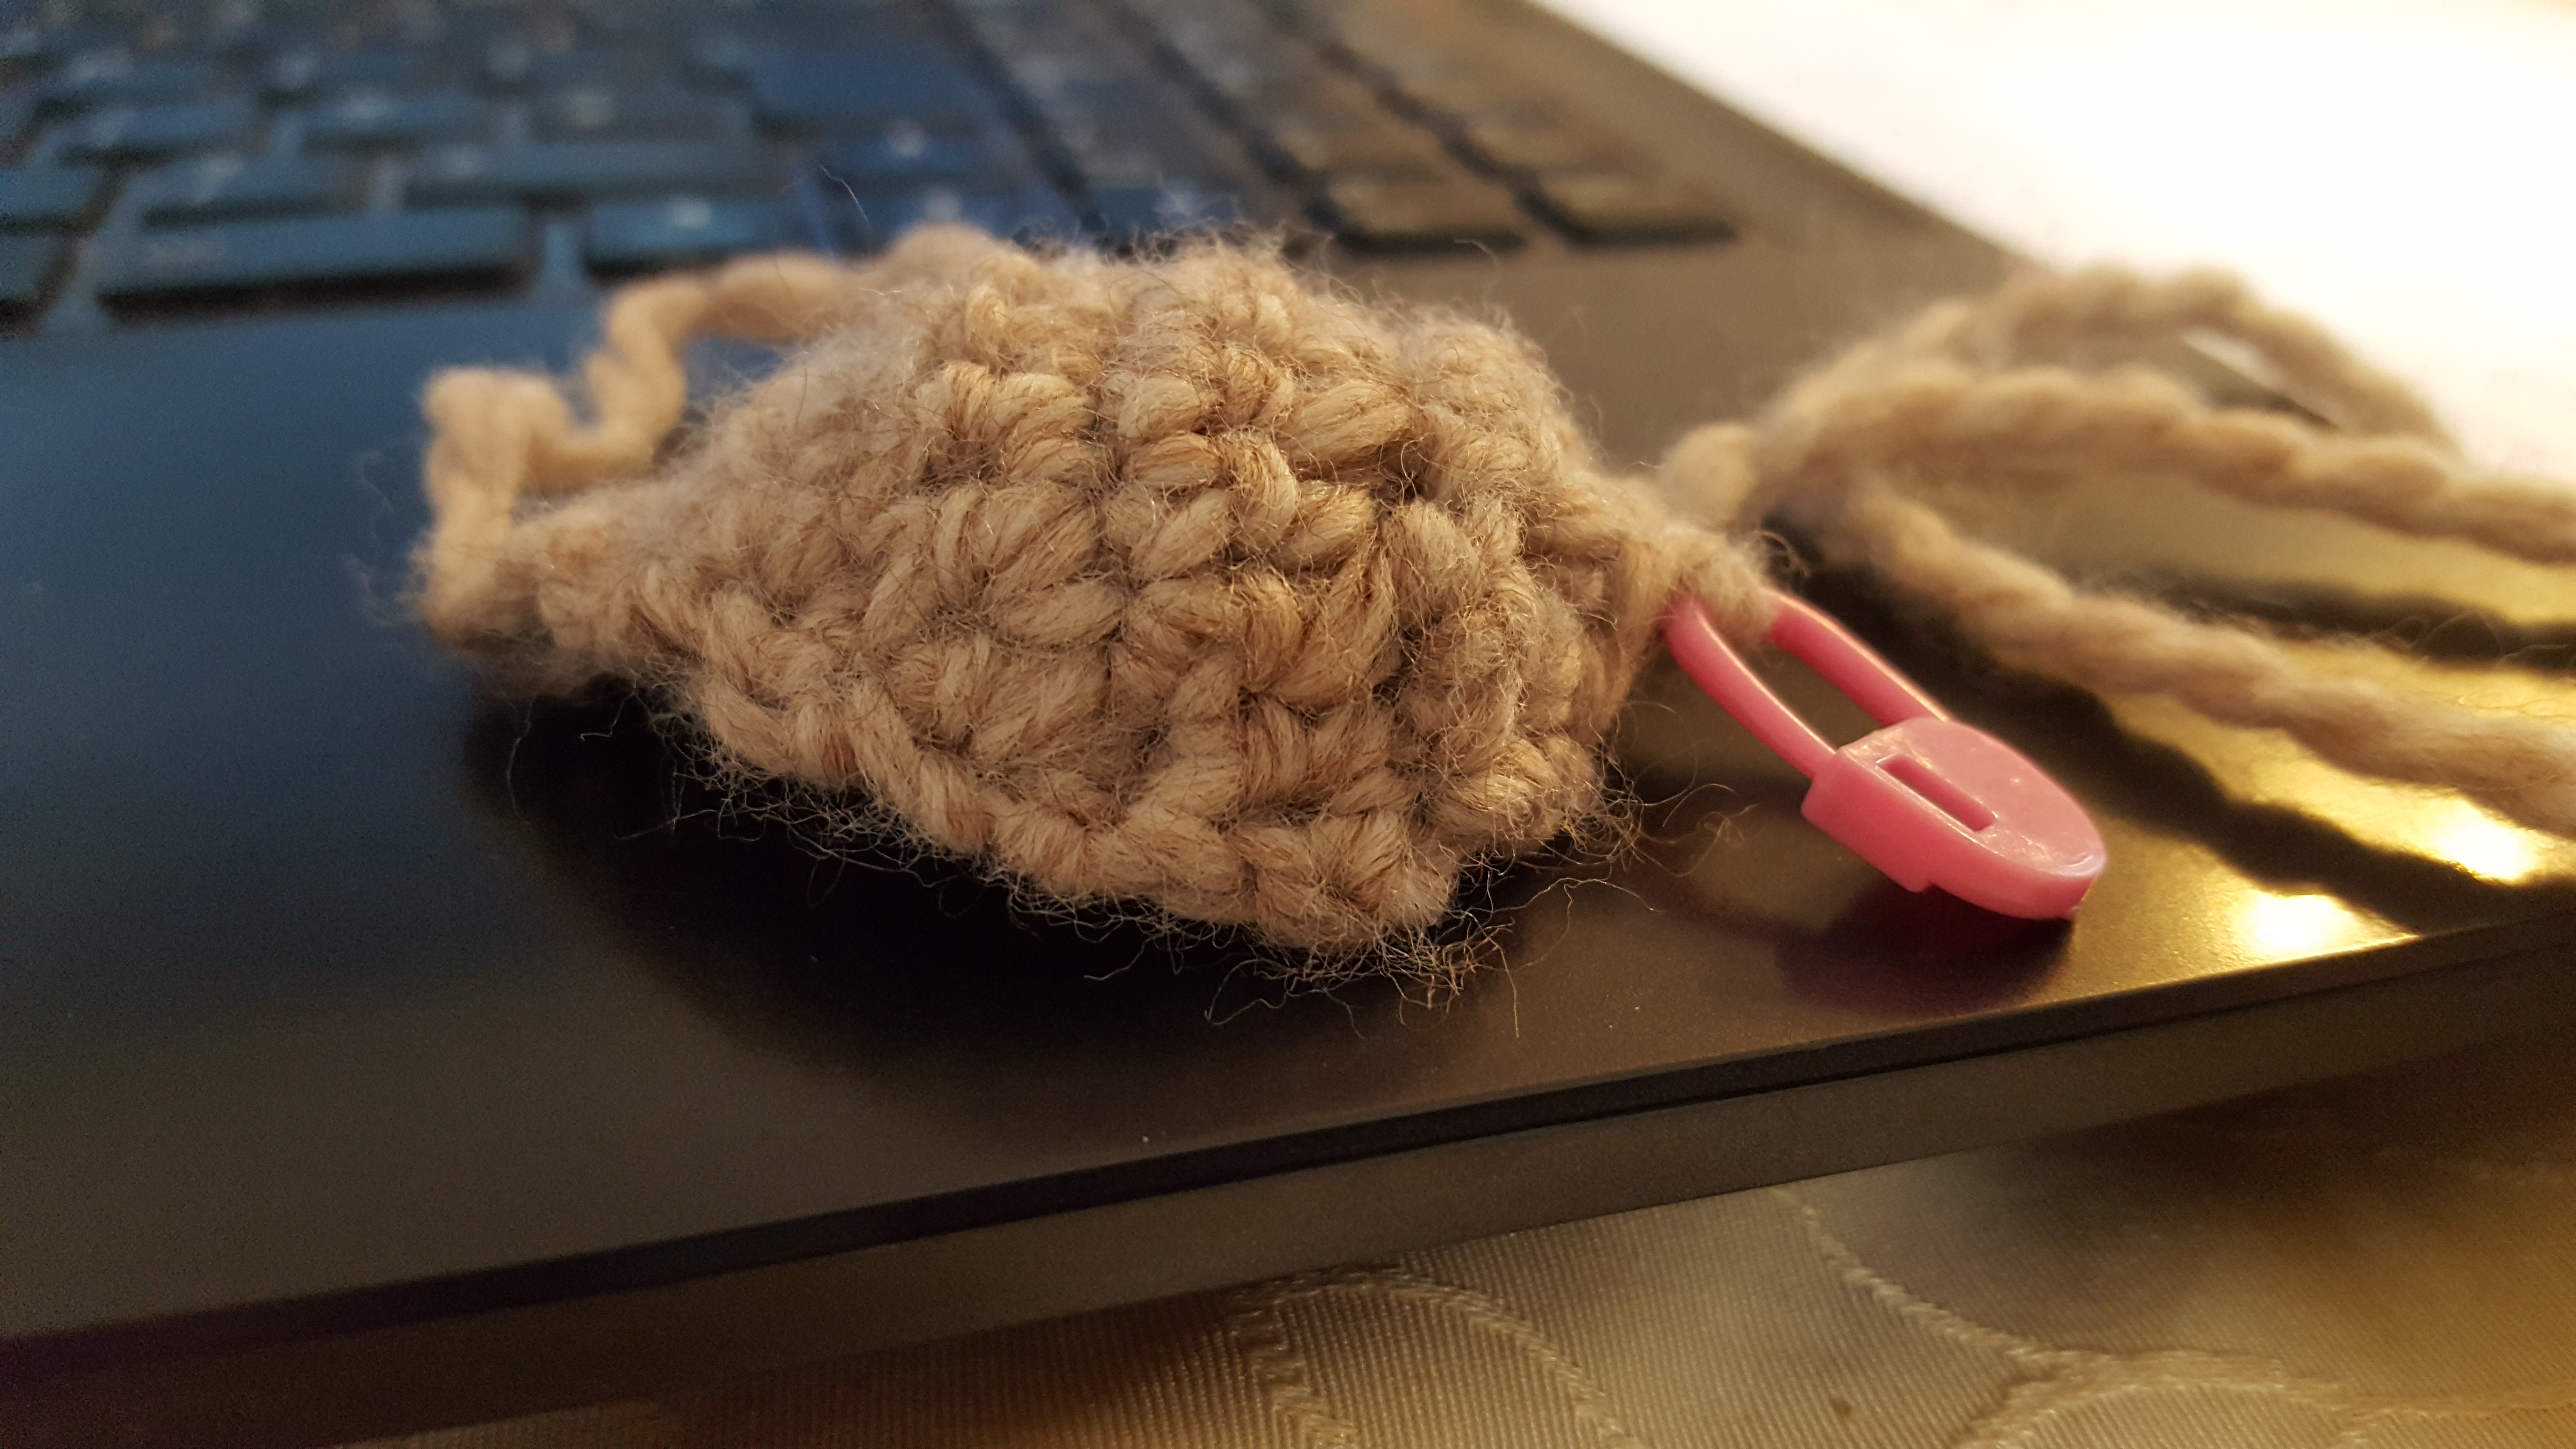
Undershell:
If you like, you can make the undershell by repeating the bit above, but I made it like this. Worked in rows; starts with the tail end.
- ch 3 [3]
- sc 2 [2]
- inc, sc [3]
- inc, sc, inc [5]
- inc, sc 3, inc [7]
- inc, sc 5, inc [9]
- inc, sc 7, inc [11]
- Continue working rows of 11 sc until you get to the size where the overshell starts to decrease
- sc, dec, dec, sc, dec, dec, sc [7]
- sc, dec, sc, dec, sc [5]
- sc, dec3, sc [3]
- Fasten off, leaving very long tail
The undershell should curve a bit; here’s a mini version:
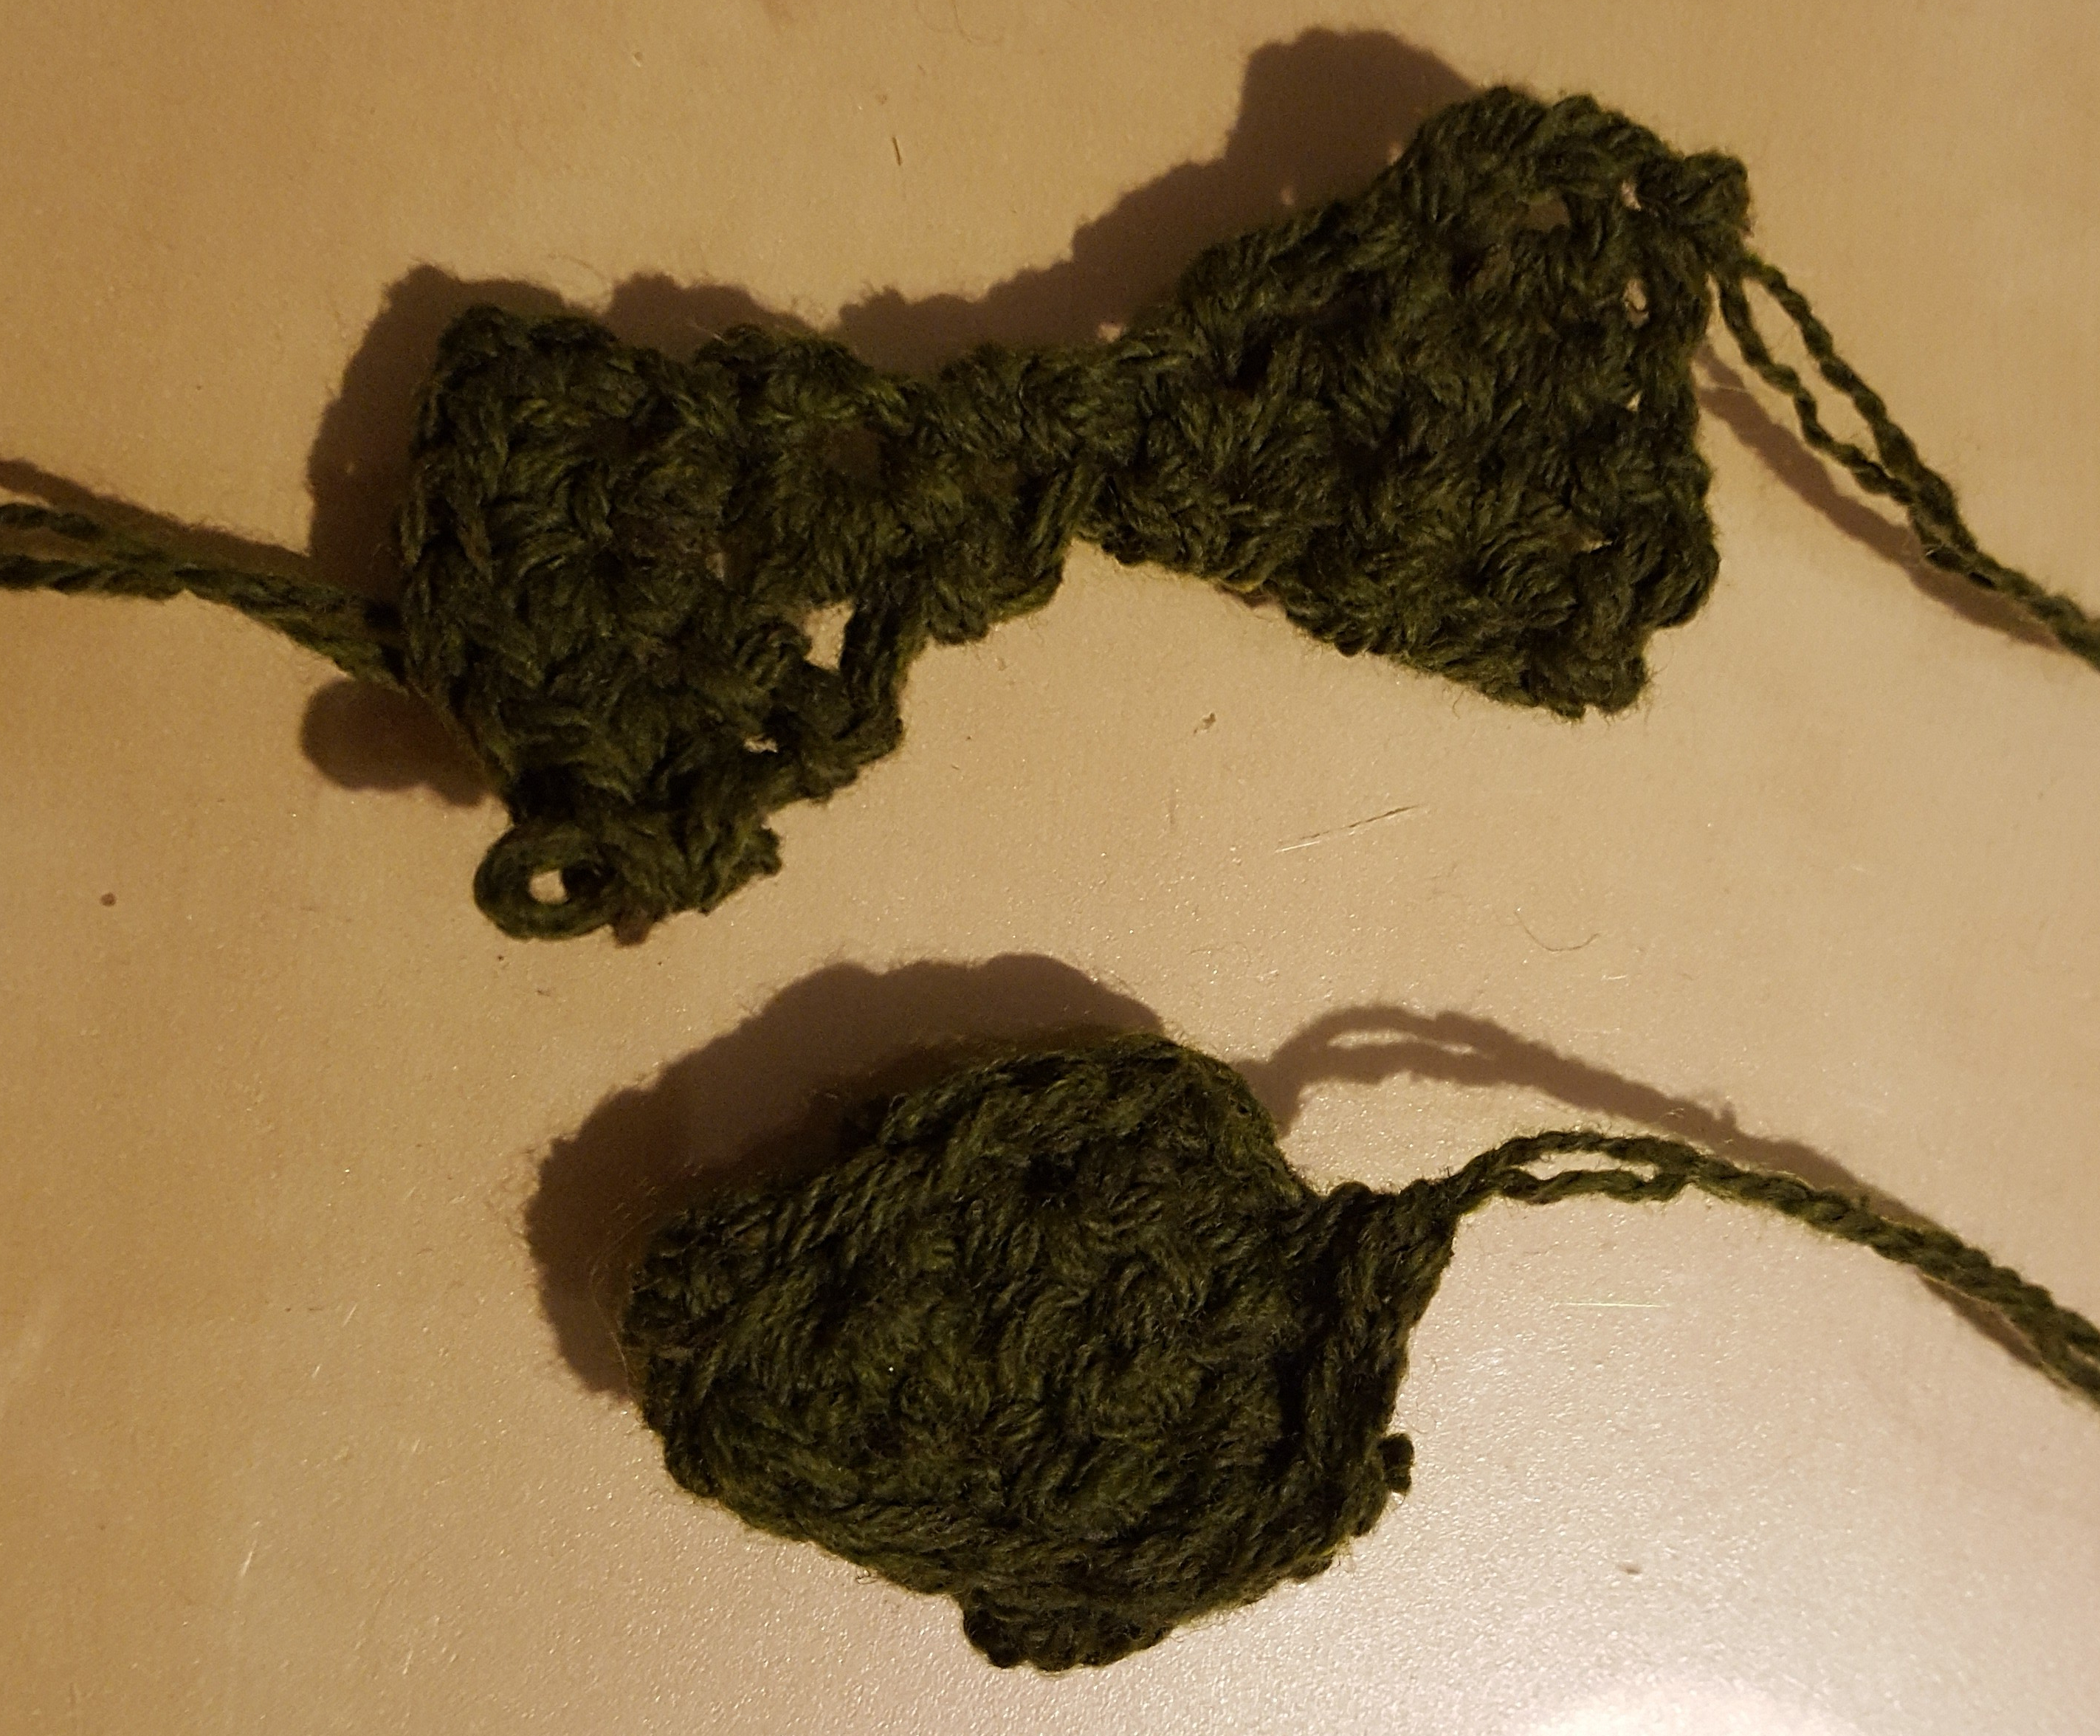
Flippers (make 4):
Work in rows.
- ch 4
- sc 3 [3]
- inc, sc, inc [5]
- sc 2, dec, sc [4]
- sc, dec, sc [3]
- dec, sc [2]
- dec [1]
- sc [1]
- inc [2]
- inc, sc [3]
- sc, inc, sc [4]
- sc, inc, sc 2 [5]
- dec, sc, dec [3]
- Fasten off and sew the two edges together OR crochet the two edges together and then fasten off
It should look something like the top bit before being sewn/crocheted together, and something like the bottom bit after:
Tail:
The tail works on the same principle as the flippers; work in rows.
- ch 4
- sc 3 [3]
- sc 3 [3]
- dec3 [1]
- sc [1]
- sc 3 into one stitch [3]
- sc 3 [3]
- Crochet around OR fasten off and sew around edges
Head:
Worked in a round. If you want a bigger, even more cartoonish head, add in more increasing rounds after 4 [i.e. (inc, sc, sc) x6; (inc, sc, sc, sc) x6, etc.] and then add a couple corresponding rounds of (sc in each st) before decreasing.
- Magic ring
- 6 sc in magic ring [6]
- (inc) repeat 6 times [12]
- (inc, sc) repeat 6 times [18]
- sc in each st [18]
- sc in each st [18]
- sc in each st [18]
- (dec, sc) repeat 6 times [12]
- Stuff the head, but not super firmly
- (dec) repeat 6 times [6]
- Fasten off, leaving long end
Assembling A’Tuin + Elephants
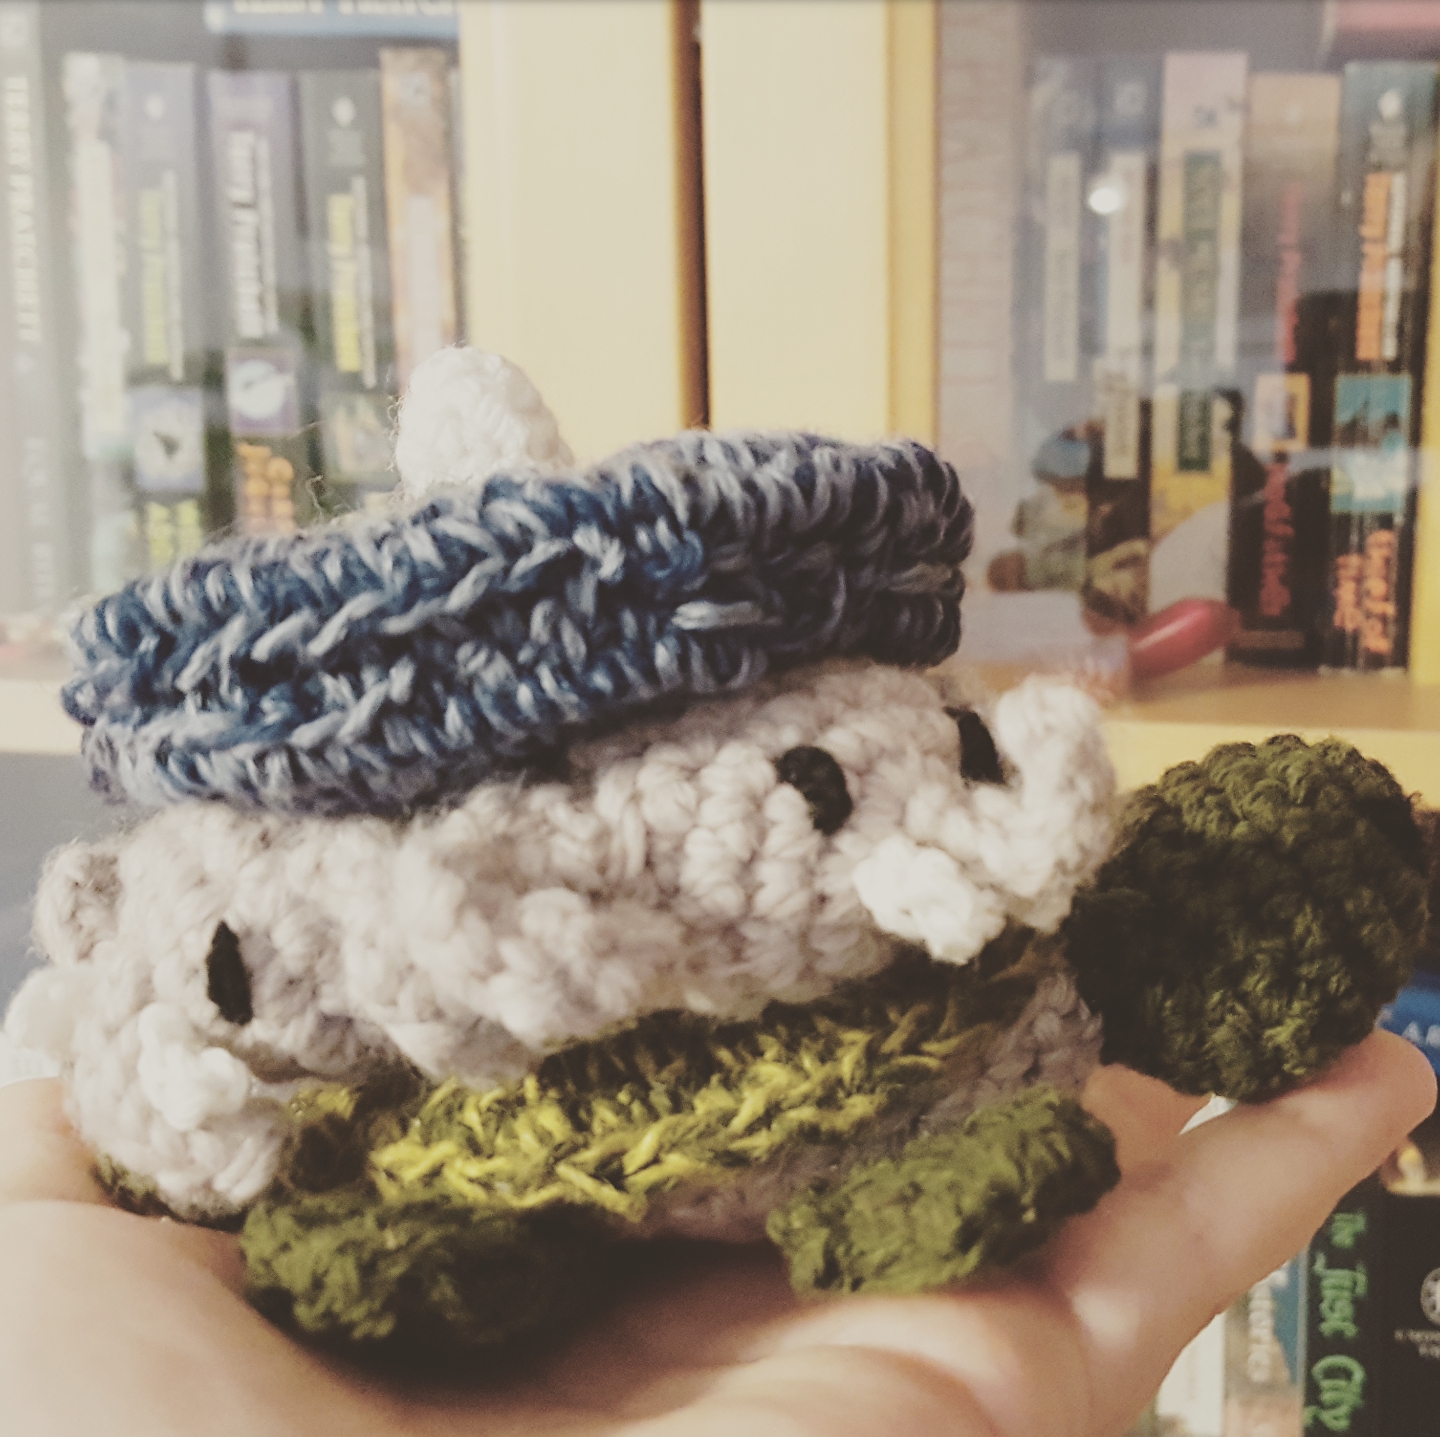
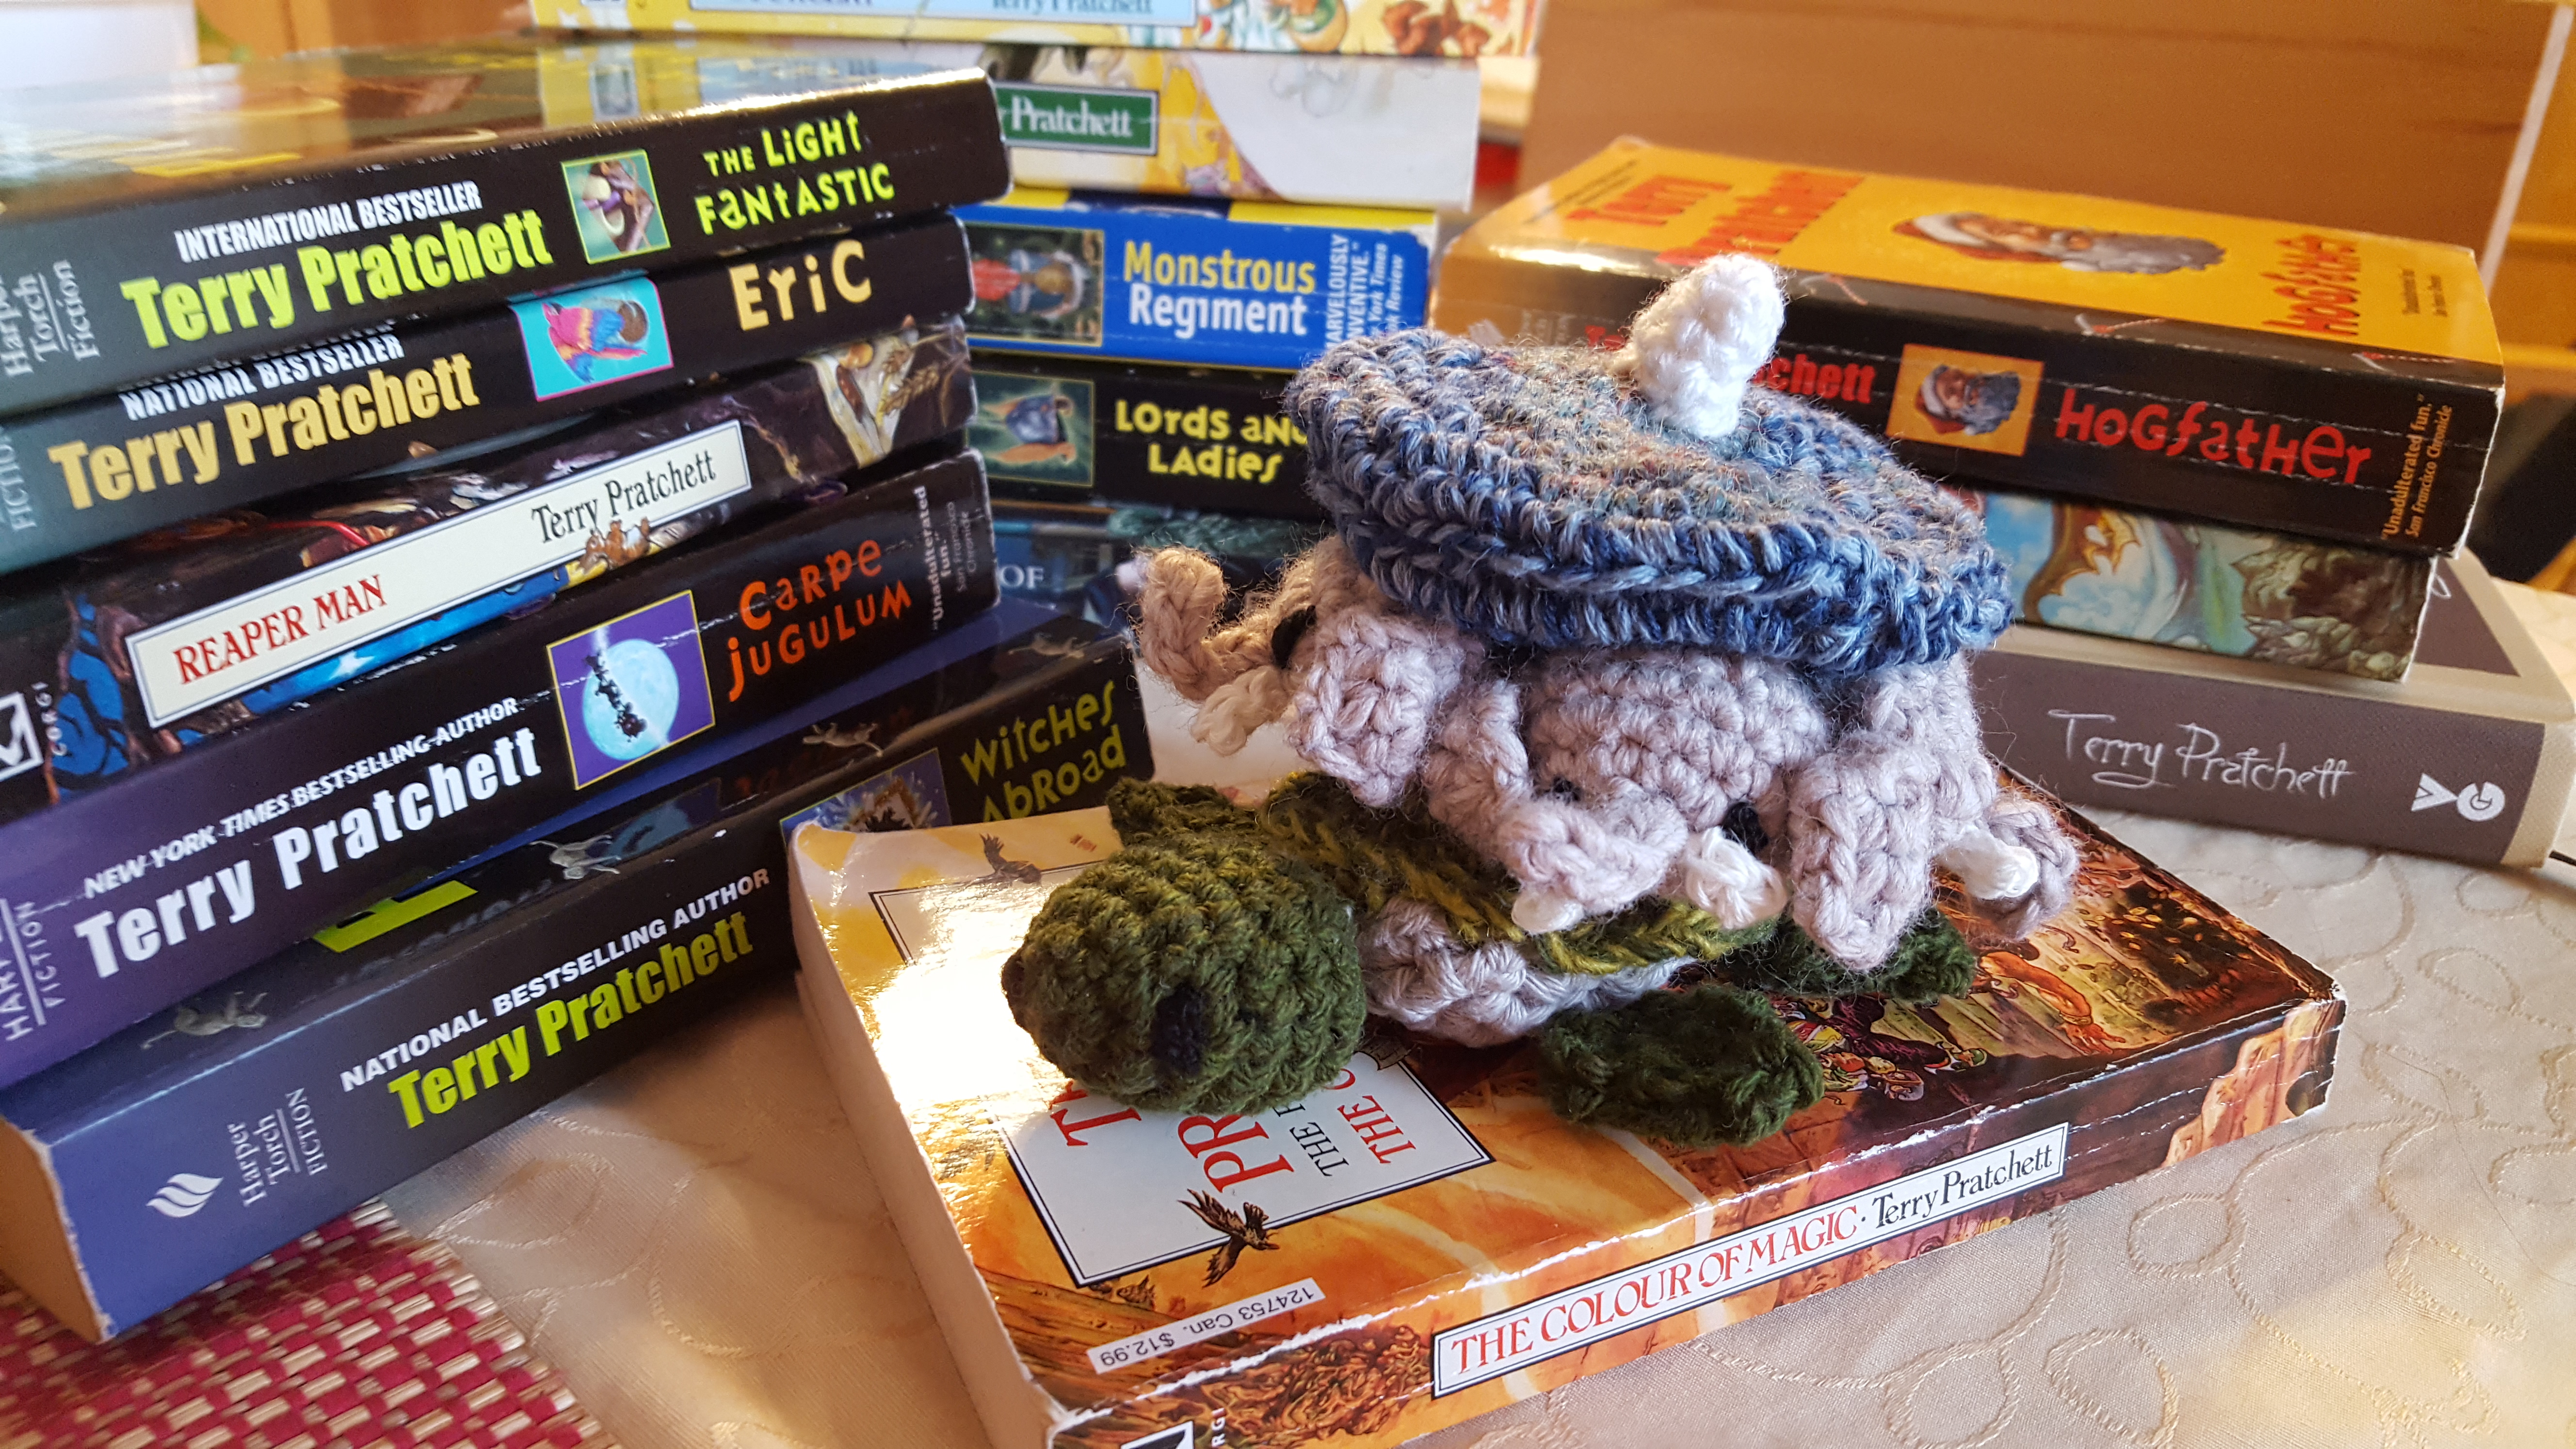
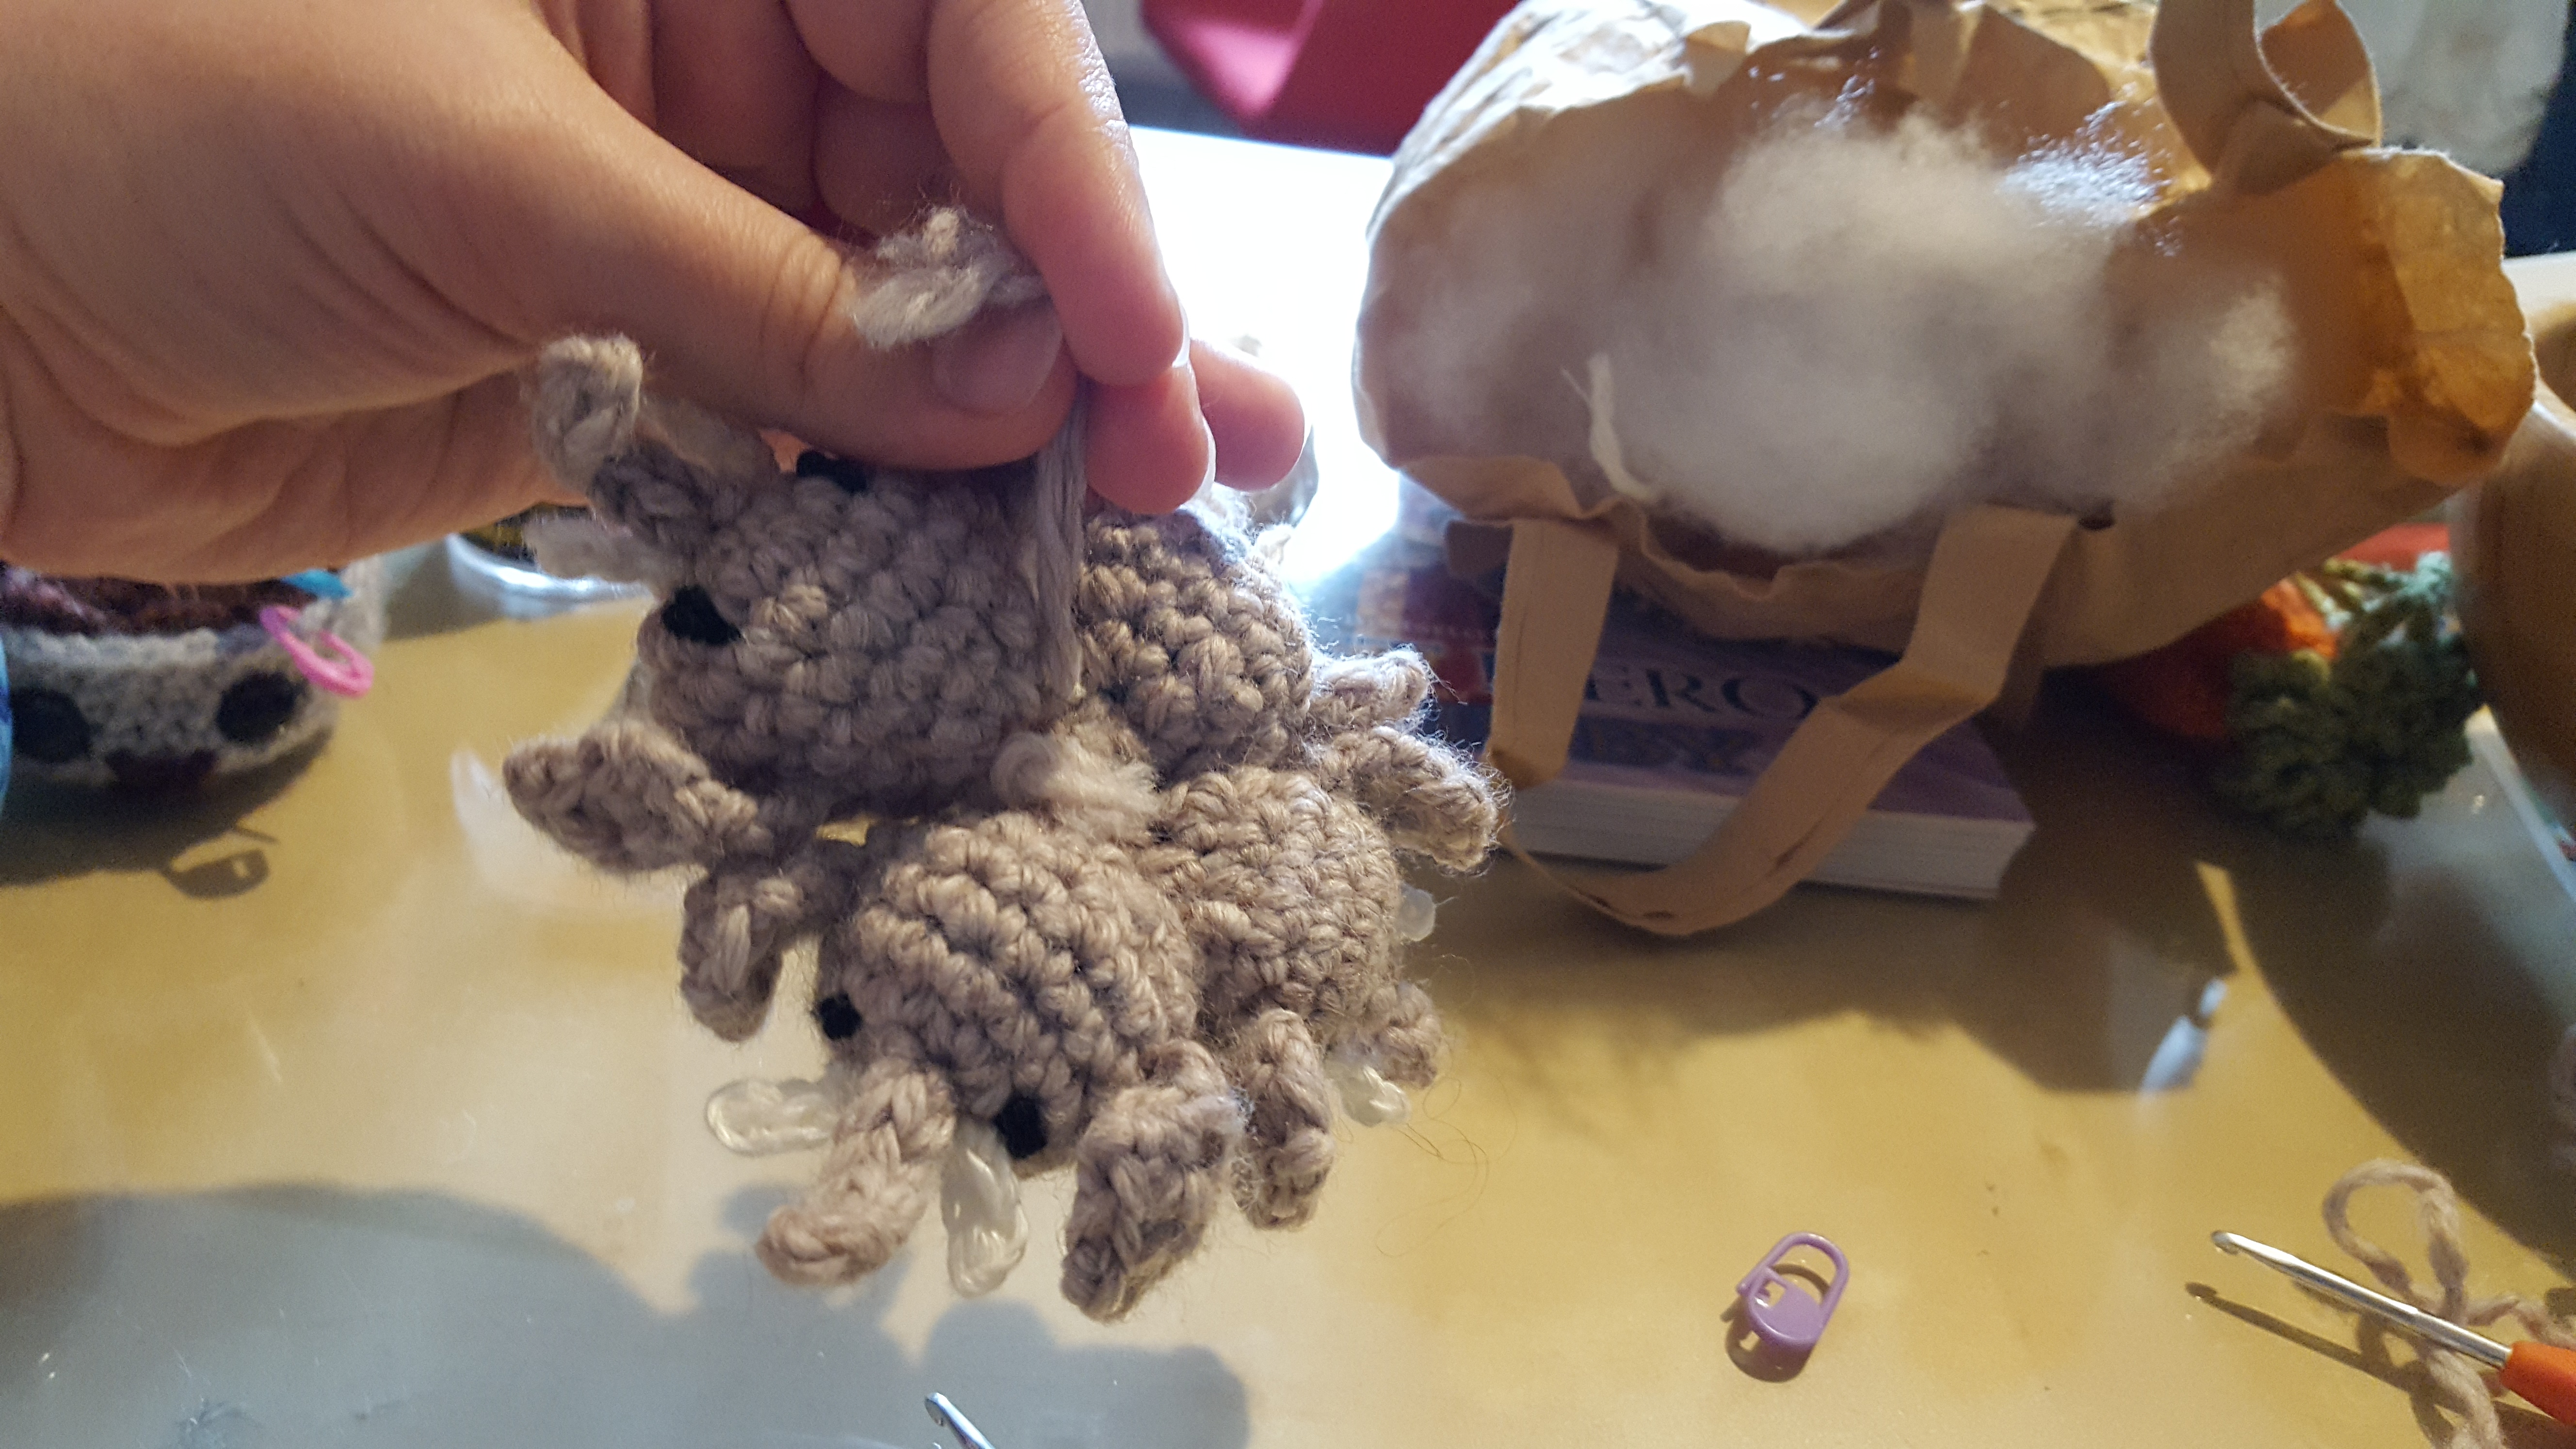
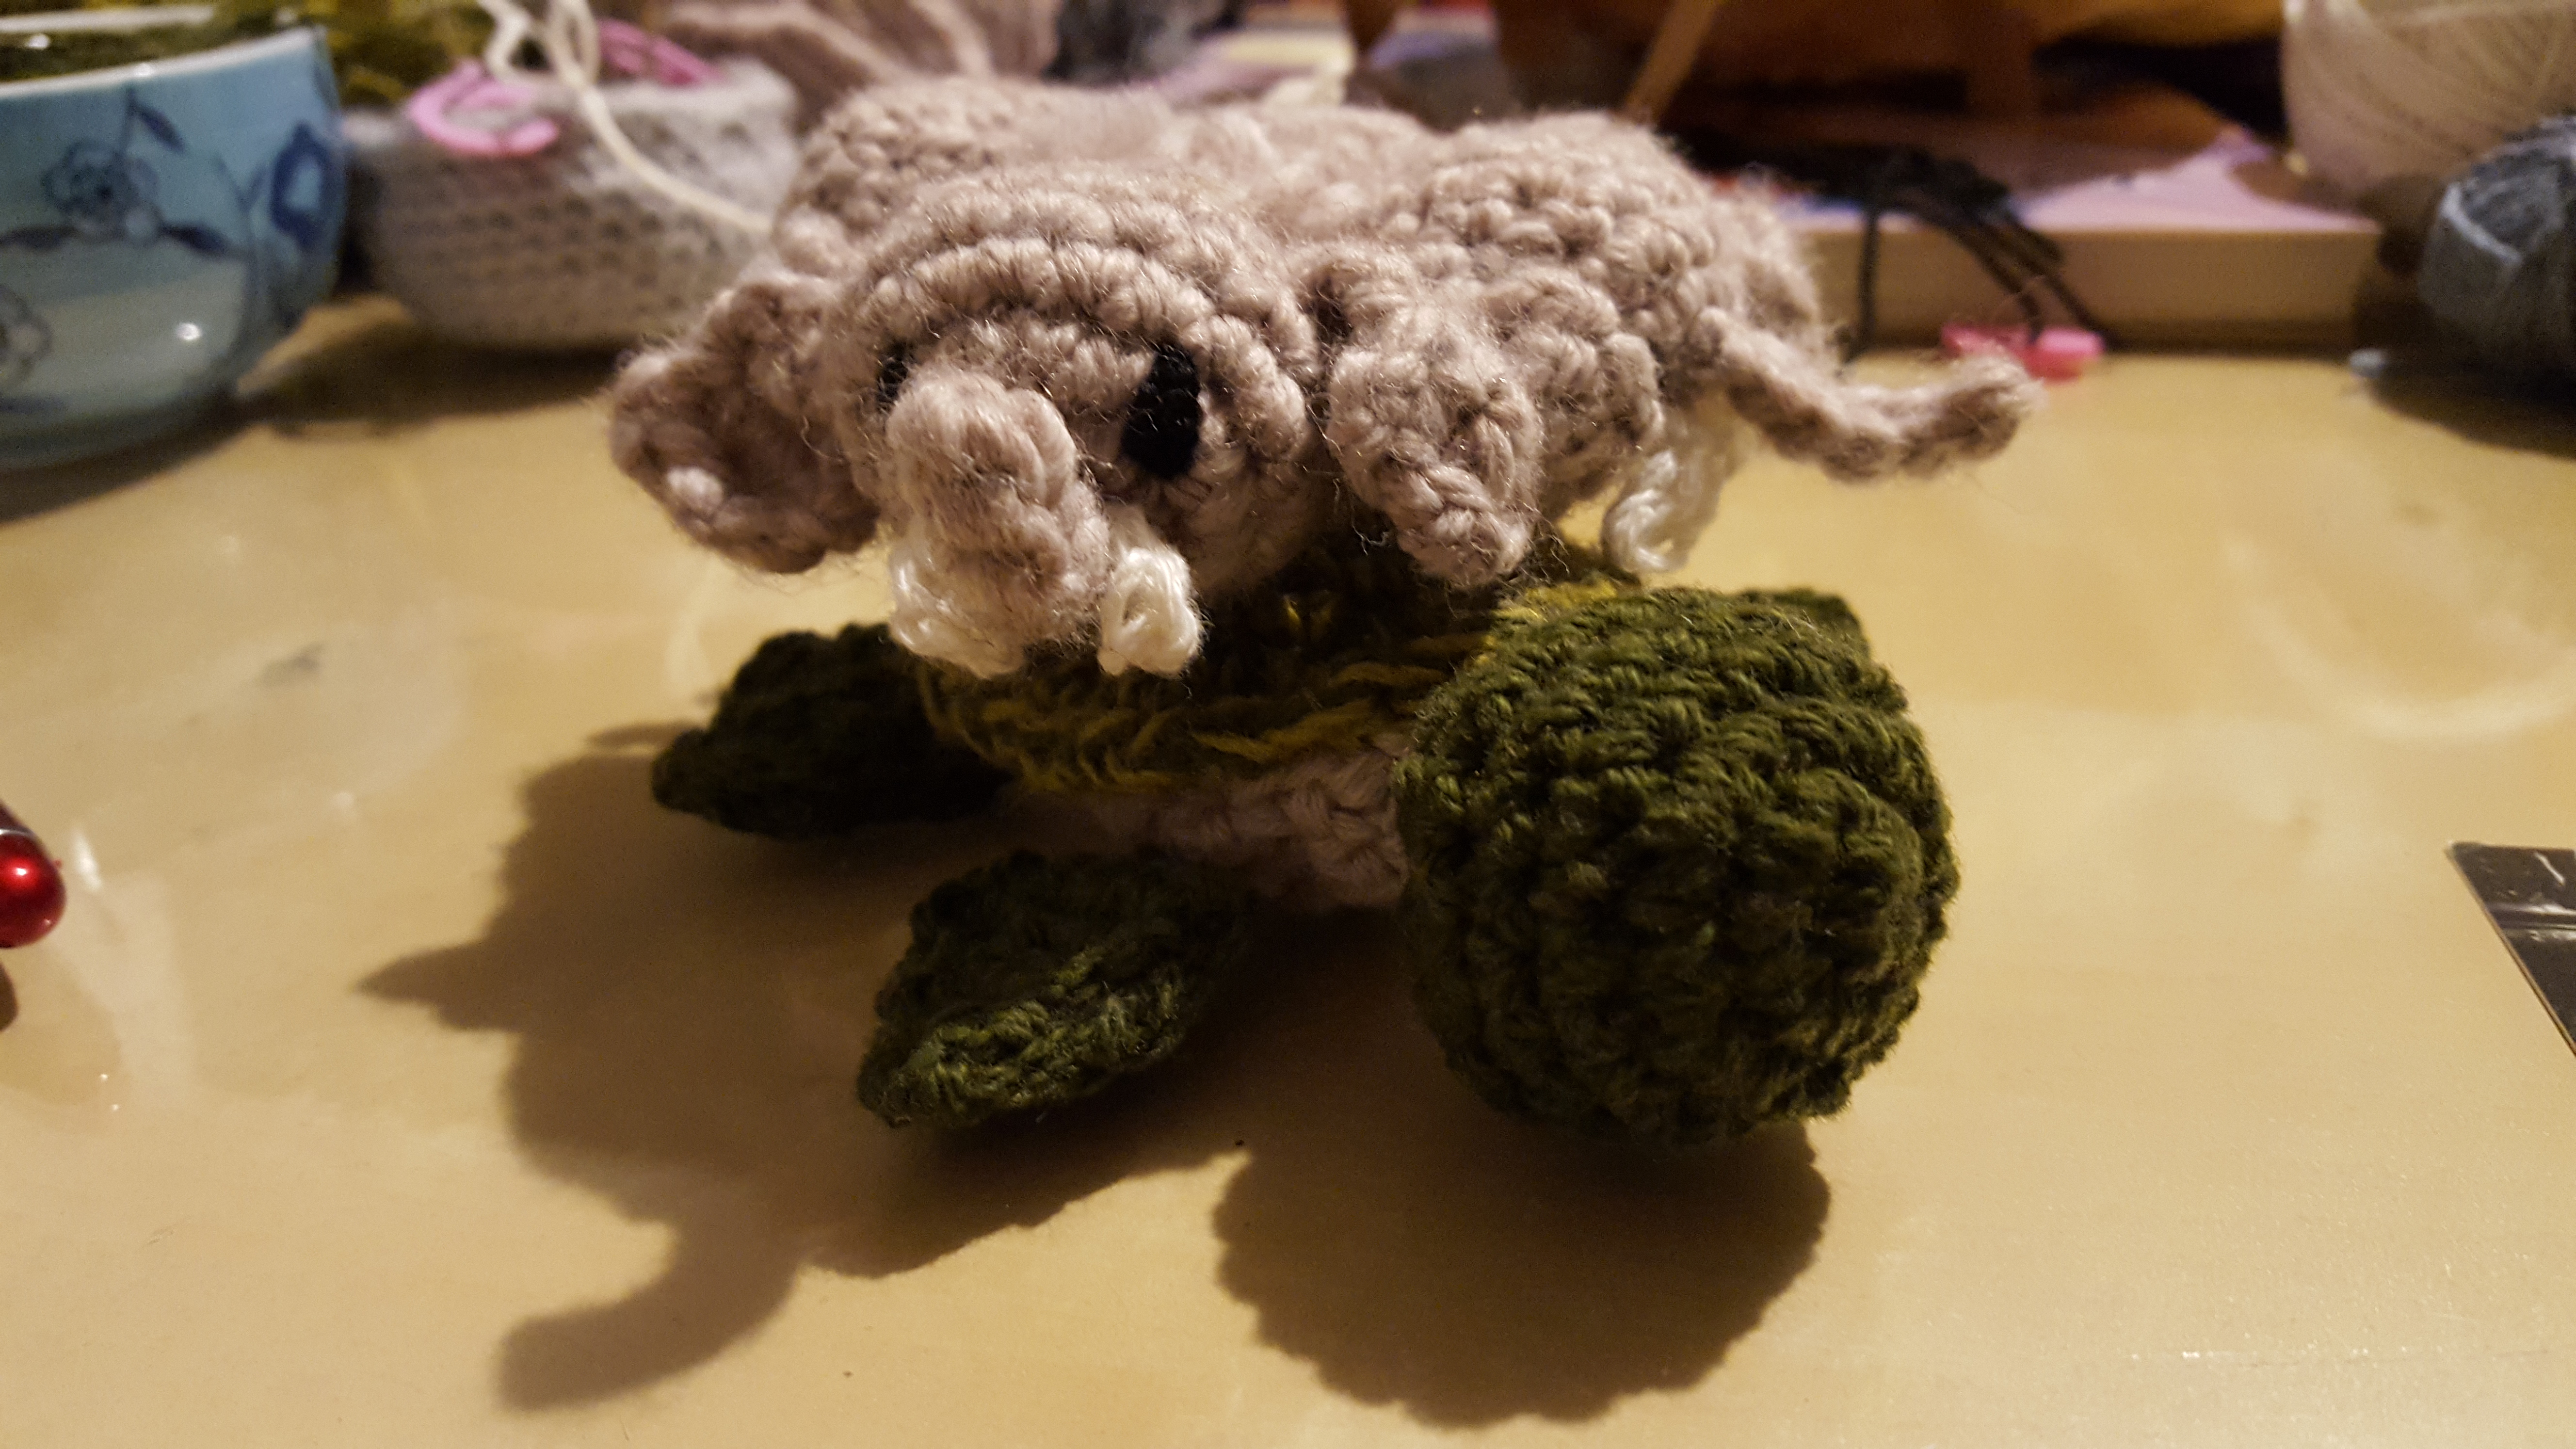
Sew the undershell to the overshell, stuffing relatively firmly as you go. The way that it works best is if you don’t sew both together at the very edge, but leave the last row of the overshell peeking over the undershell. Sew some eyes on the head and squish it so it’s more oval-y than a perfect sphere. Then attach the flippers, head, and tail to the undershell, like this:
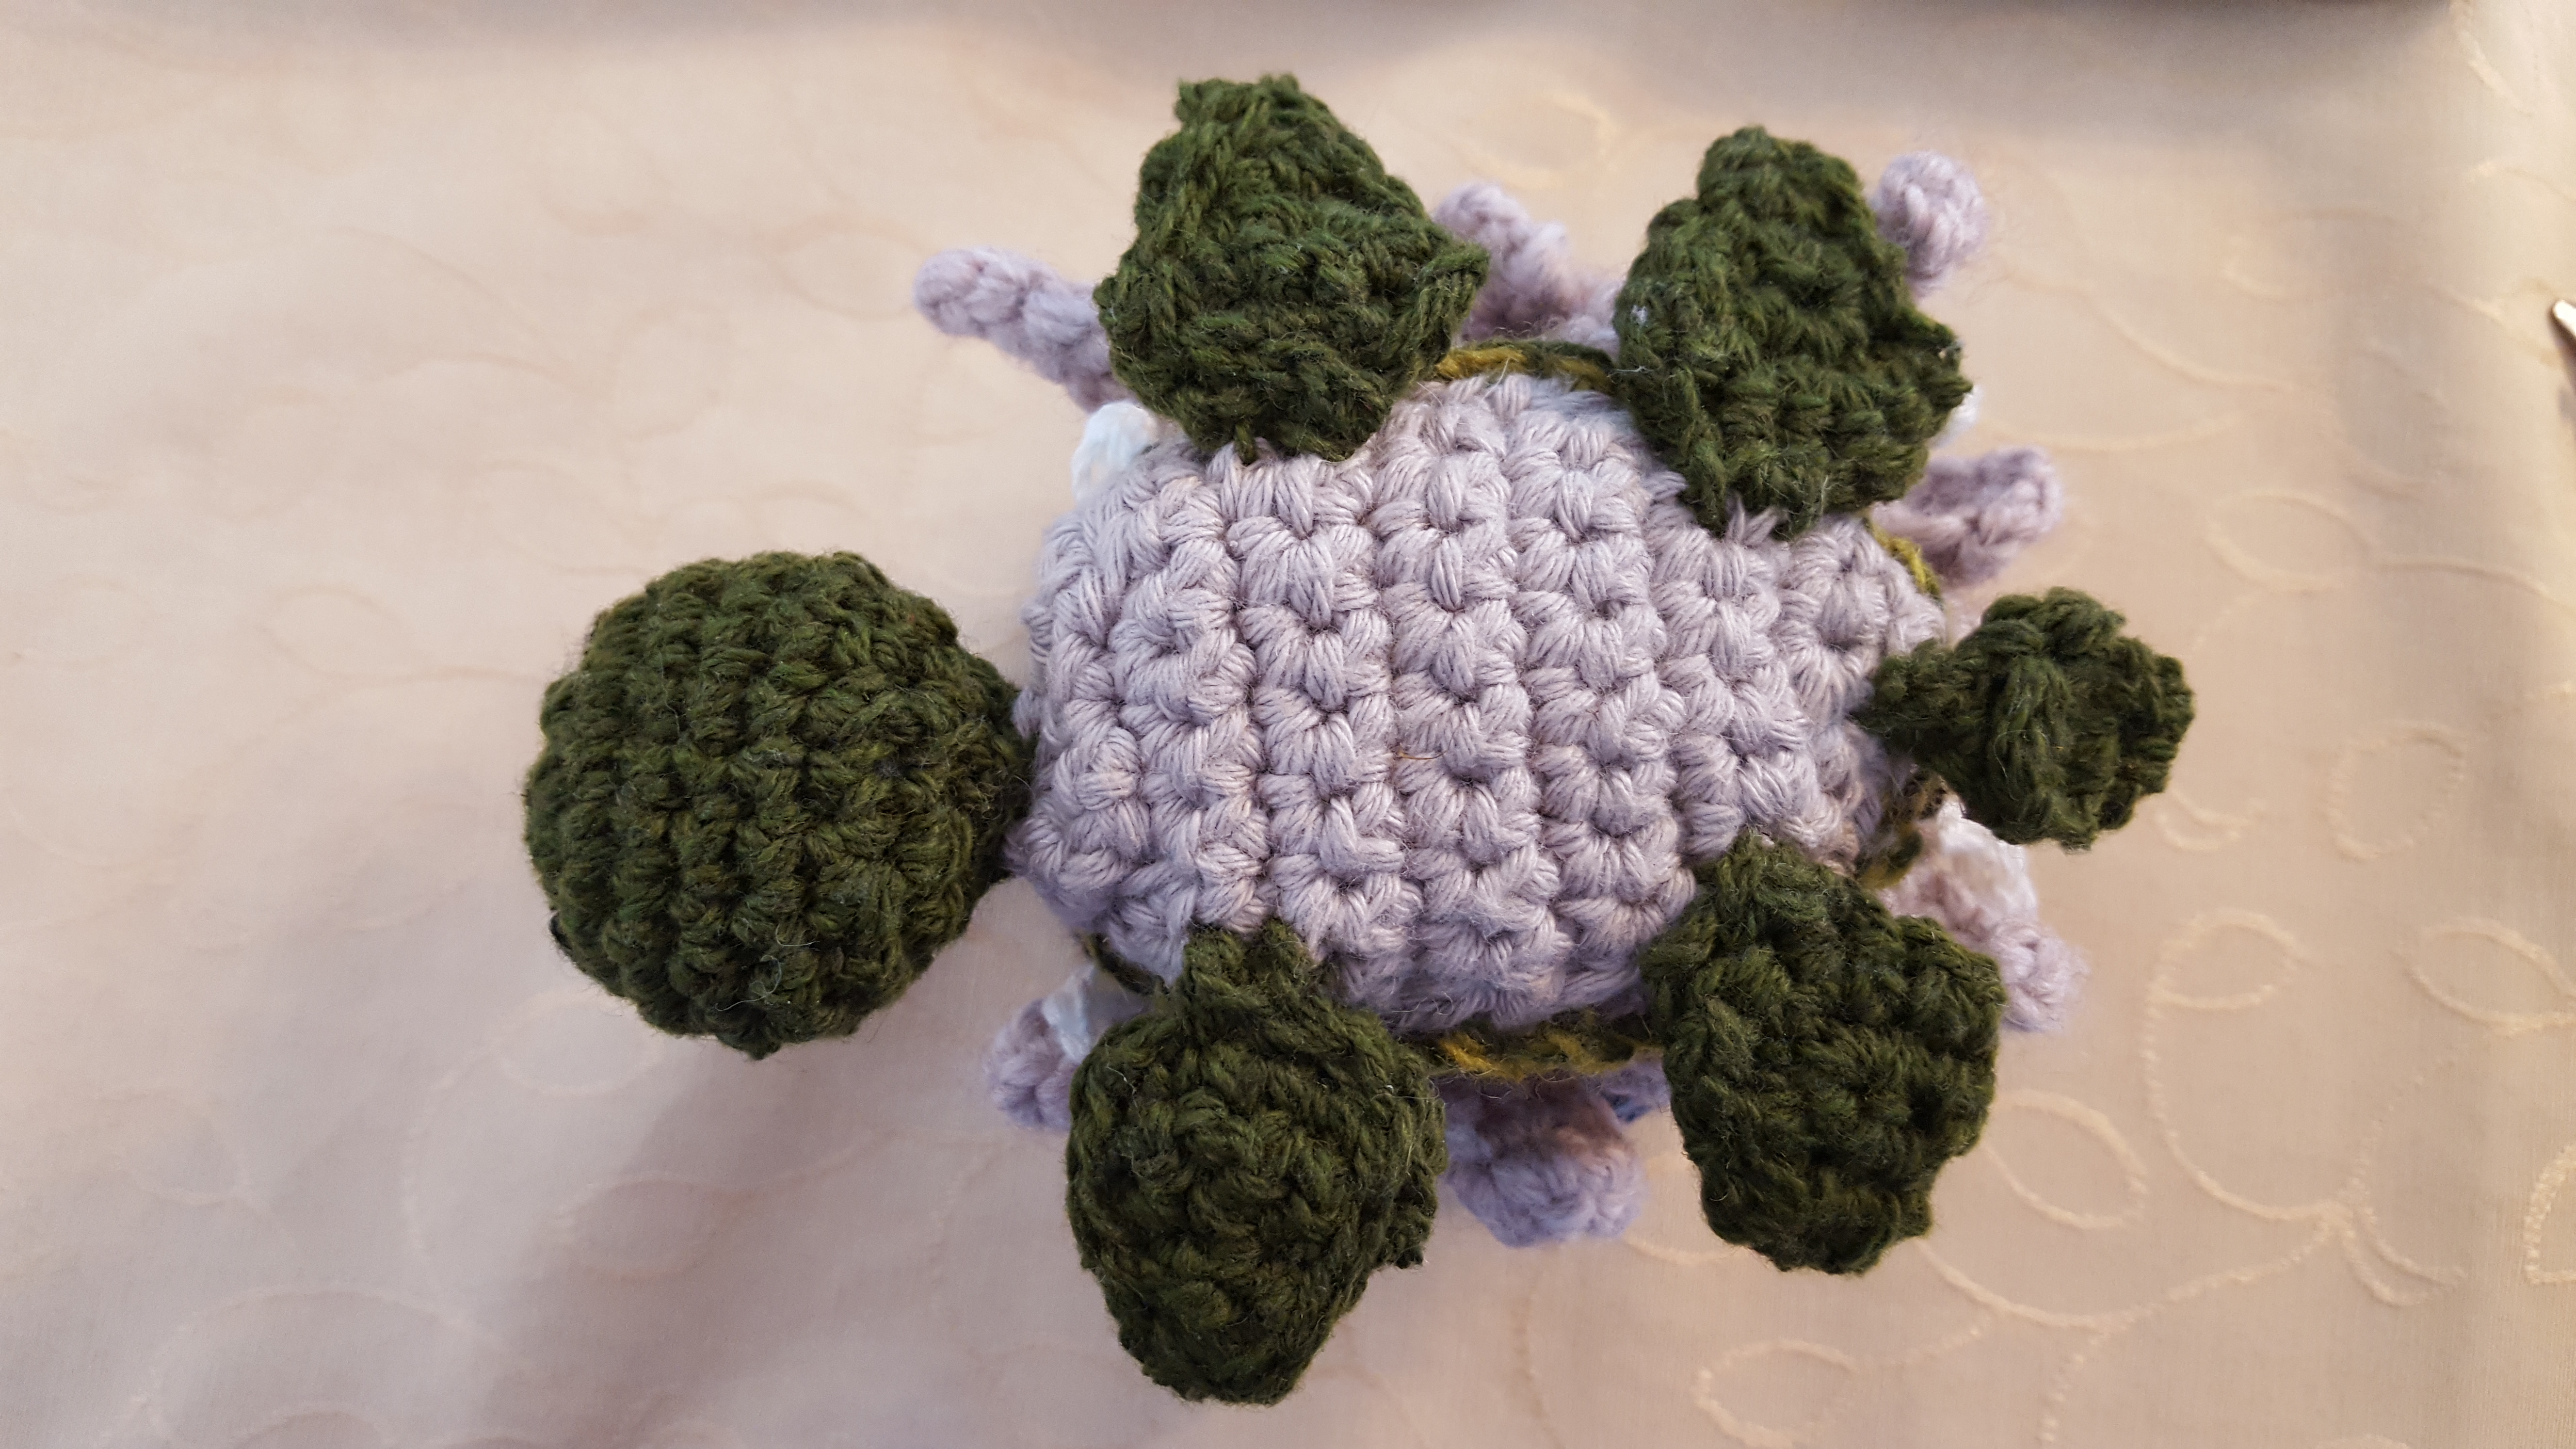
If there’s a smart way to attach the elephants, I don’t know it. I just sewed through the elephants into the overshell, making sure that I sewed closer to the elephant “butts” so you can’t see any stray yarn. Your Discworld should now look something like this:
The Disc:
The Disc is comprised of two circles crocheted/sewn together: the under/WATER layer, and the over/LAND layer. This gives it a more 3D effect. If you’d prefer a flatter Disc, just skip the WATER layer!
WATER layer:
Use blue all the way around; work in rounds. I used two thinner strands of light blue and dark blue together because I didn’t have anything else for extra ~realism.
- Magic ring
- 6 sc in magic ring [6]
- (inc) repeat 6 times [12]
- (inc, sc) repeat 6 times [18]
- (inc, sc 2) repeat 6 times [24]
- (inc, sc 3) repeat 6 times [30]
- (inc, sc 4) repeat 6 times [36]
- (inc, sc 5) repeat 6 times [42]
- (inc, sc 6) repeat 6 times [48]
- Sl st into next st, fasten off
LAND layer:
So, there’s several ways of doing a LAND layer, depending on how advanced at crocheting you are. The basic pattern for both is the same as for the the WATER layer.
If you can know how to switch colours easily, get a map of the Discworld and go wild. (Don’t forget XXXX!). I tried to follow the gigantic one I got with The Compleat Discworld Atlas.
If you can’t be bothered doing all that, do the first 6 or so rounds in green or brown, fasten off and do the rest in blue.
When you finish the LAND layer, do NOT fasten off!
Re Cori Celesti, the home of the gods – I did a “pop-up” version that goes like this:
- Magic ring
- sc 4 [4]
- sc 4 [4]
- inc, sc, inc, sc [6]
- Fasten off, leave long edge for sewing
But you can of course do a much smaller one or just plain do the middle of the map in white and leave the Disc flat.
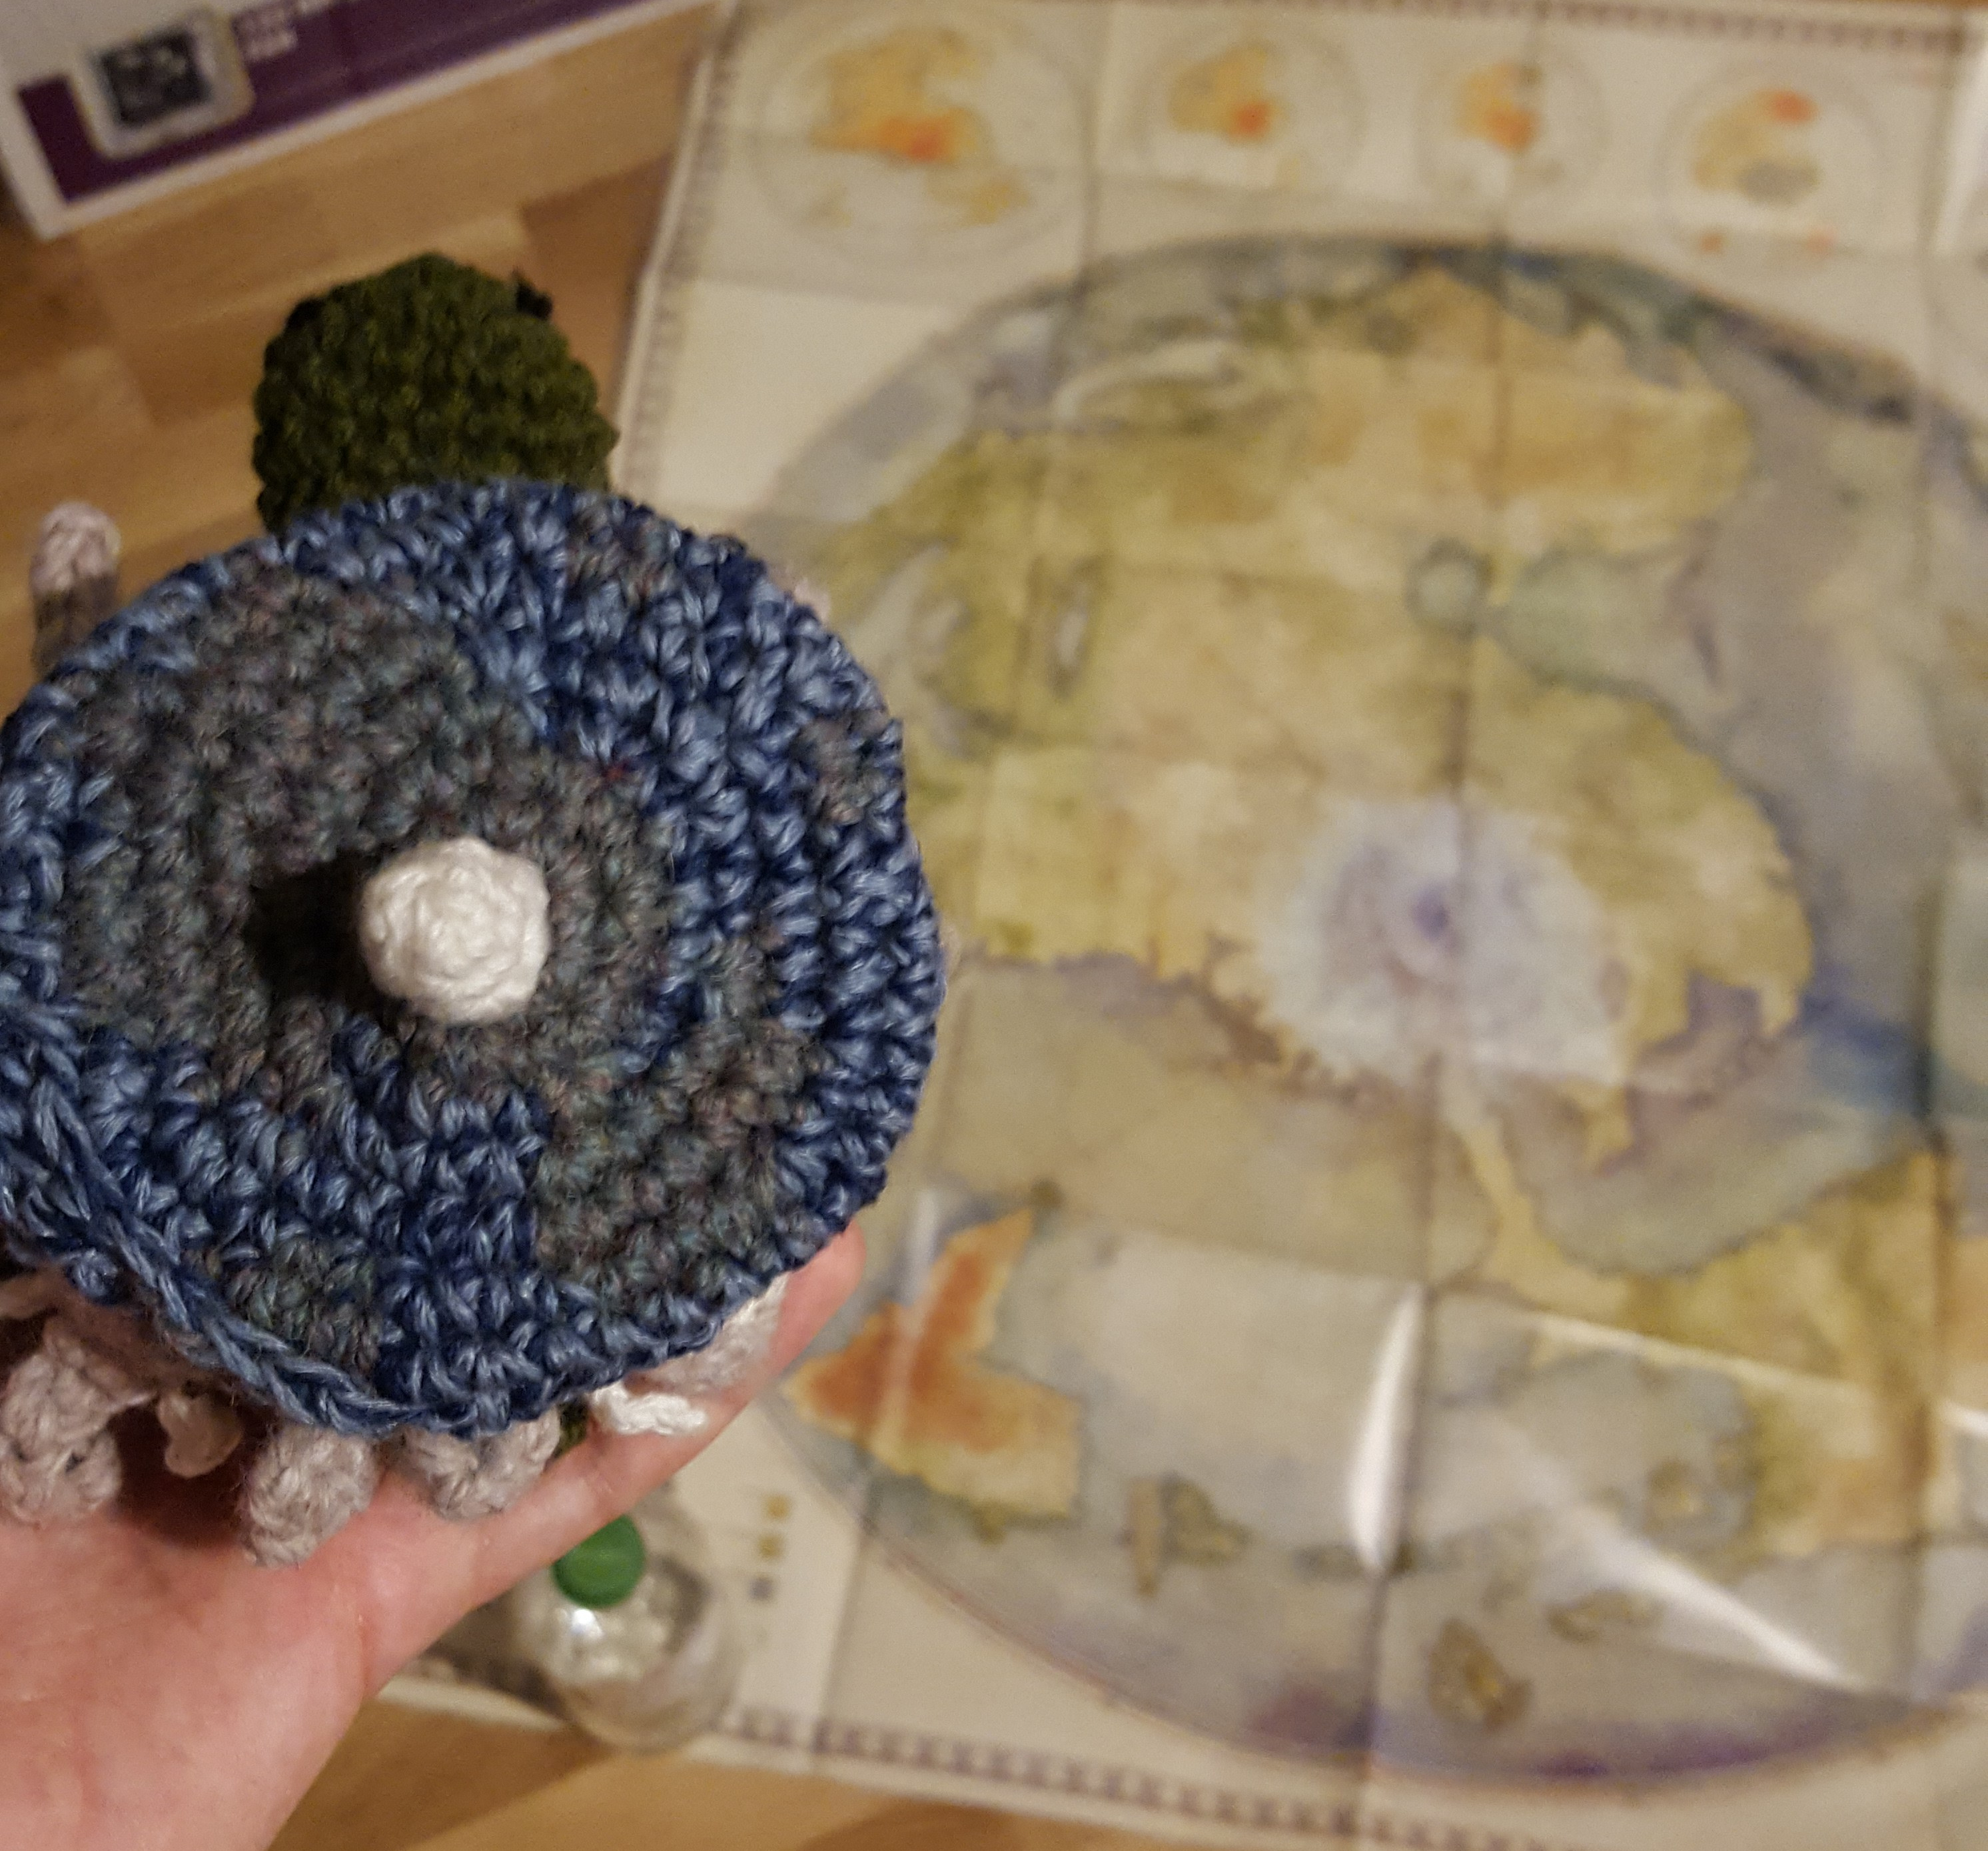
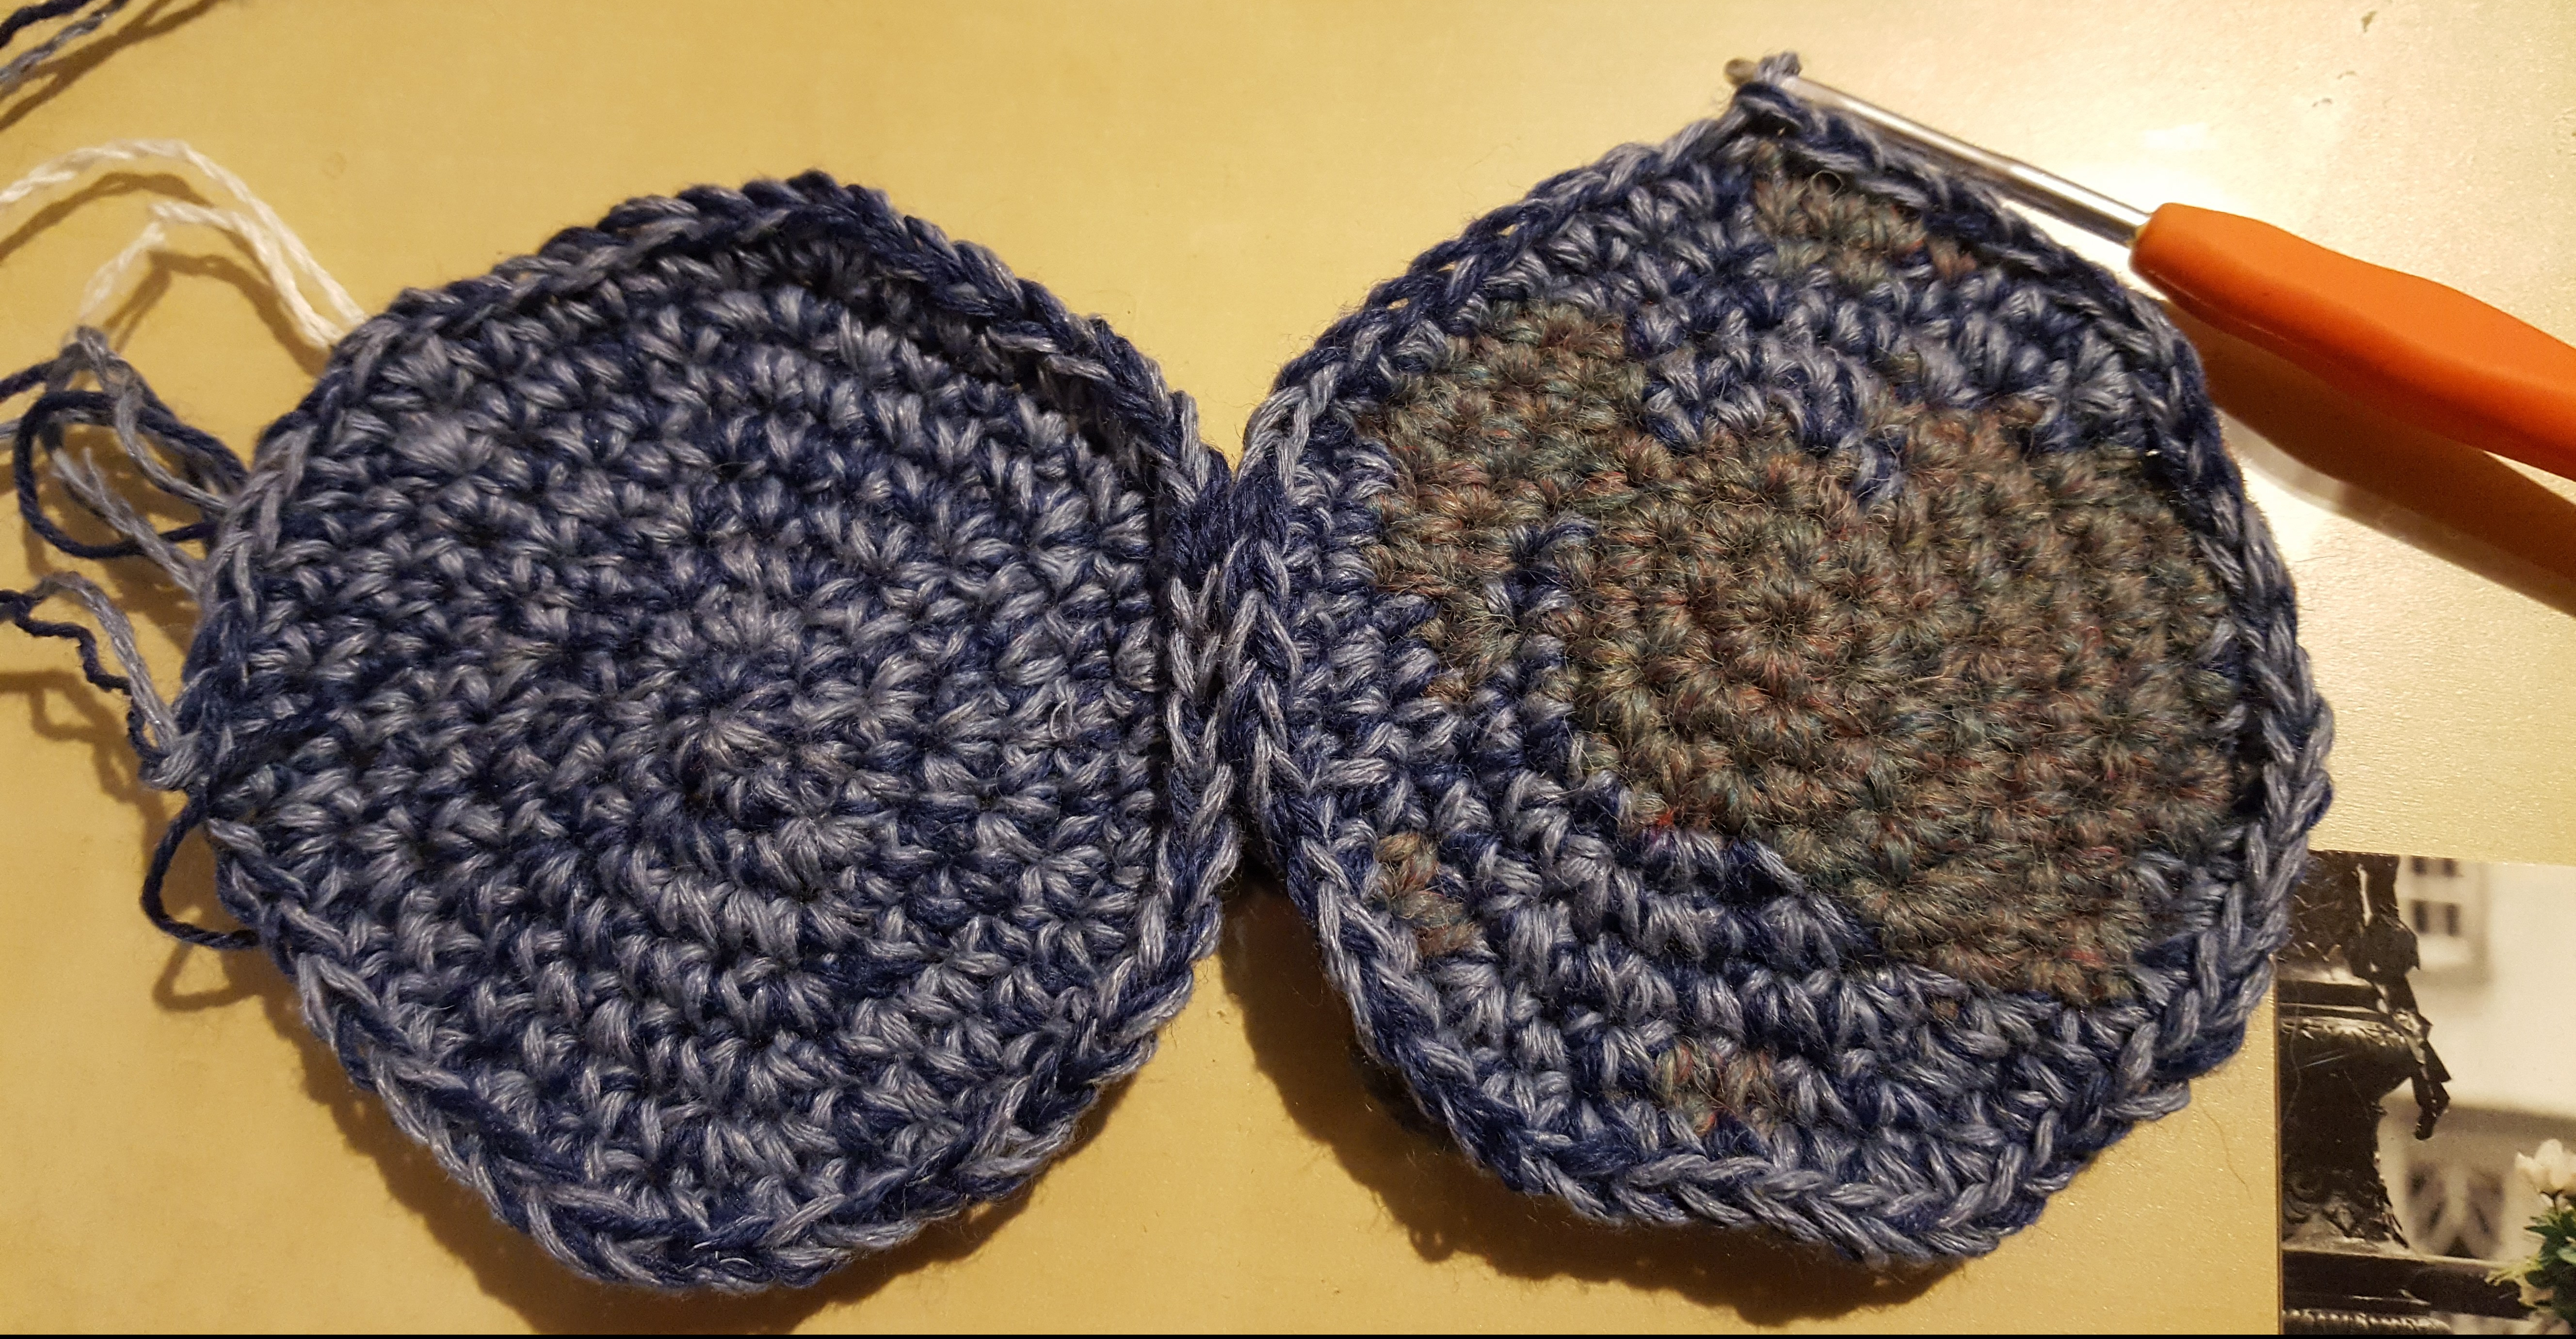
Assembling the Disc
You should now have two circles which look vaguely like this:
Now, smush the two sides together, “pretty” sides facing inwards, and crochet the two layers together. Don’t worry if this part is a bit messy: it’ll help create an uneven Rimfall effect. When there’s just a bit left, turn the Disc inside out so the “pretty” sides are facing out again and crochet closed or fasten off and sew closed. You should now have a 3D Disc, to which you can attach a pop-up Cori Celesti.
Now, sew the bottom layer to the elephants; again, I just did it by going around with some blue a couple times so that it’s firmly attached. And there you have it. Happy crocheting and GNU Pratchett.

0 thoughts on “A Crocheted A’Tuin – Make Your Own!”